The Complete Fishing Gear Checklist: Everything You Need Before You Cast a Line
A room-by-room, tackle-box-by-tackle-box guide to packing smart for any trip — lake, river, surf, or boat.
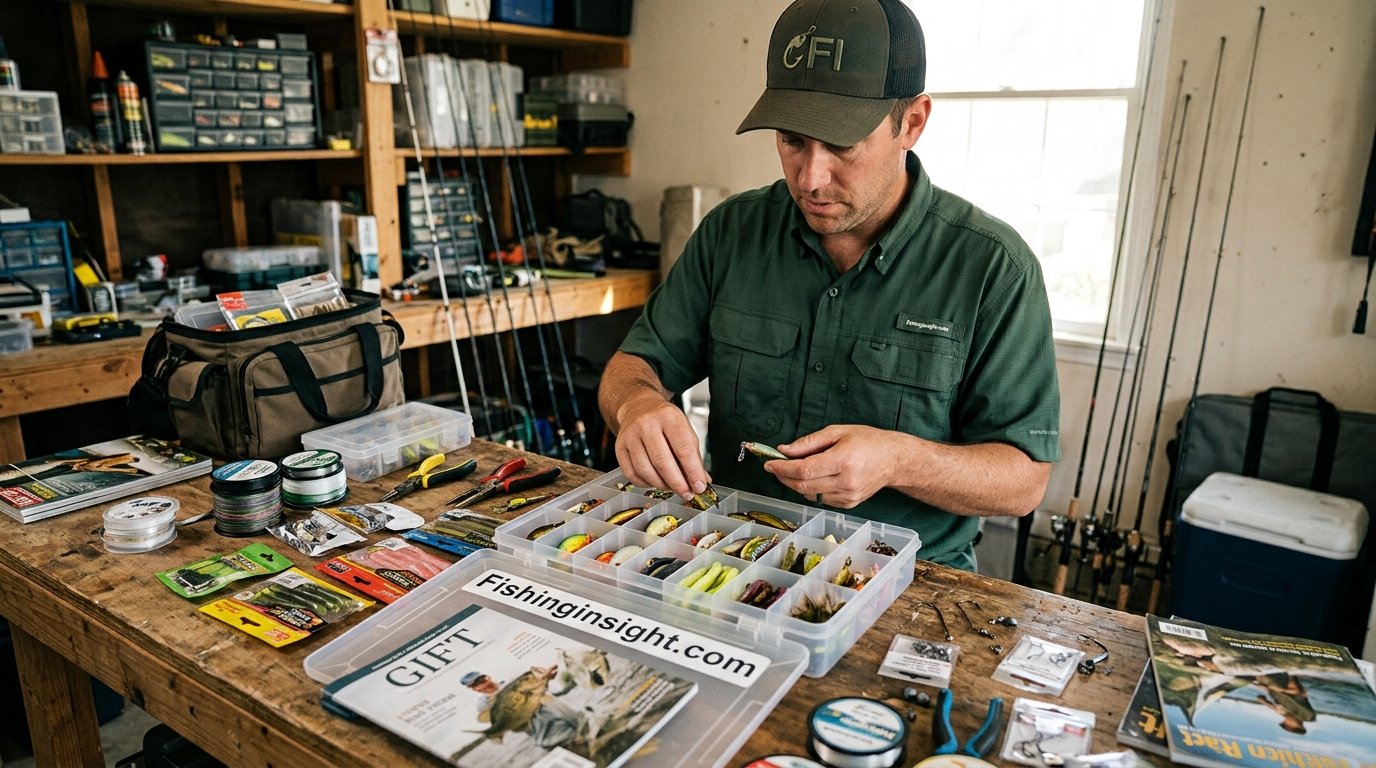
There’s a particular kind of frustration that only anglers know: standing on the bank, rod in hand, realizing you left the pliers in the garage — or worse, that your only spool of line snapped off on the drive over. A good fishing trip isn’t just about picking the right lake or the right lure. It’s about showing up with everything you need, nothing you don’t, and a system for finding it fast when a fish is already on the line. That’s exactly what this fishing gear checklist is built to solve.
Whether you’re loading up a truck for a weekend at the lake, packing a backpack for a hike-in stream, or organizing a boat locker for a full season, this guide walks through every category of gear worth owning, why it matters, and how to prioritize your spending. We’ll cover rods and reels, line and terminal tackle, lures and bait, electronics, footwear, apparel, safety equipment, storage, maintenance tools, and specialized setups for kayak, ice, and saltwater fishing. Along the way, you’ll find comparison tables, pros-and-cons breakdowns, and printable-style checklists you can screenshot before your next trip.
If you’re just getting into the sport, start with our complete fishing guide for a broader introduction to techniques, species, and seasons — then come back here to build your actual gear bag.
One thing worth setting expectations on before diving in: there is no single “perfect” gear list that works identically for every angler. A checklist built for a bass angler running a bass boat on a large reservoir looks meaningfully different from one built for a fly angler wading a small mountain stream, which in turn looks different from a family heading to a stocked community pond for an afternoon. What follows is designed as a comprehensive reference you can pull specific sections from based on your own situation, rather than a rigid list every single item of which applies equally to every trip. Read through the categories that matter most to your typical fishing, skim the rest for context, and return to this guide as your fishing habits evolve and expand into new territory — new bodies of water, new target species, or new techniques you haven’t tried yet.
It’s also worth acknowledging upfront that gear preferences are genuinely personal, shaped by years of individual experience, regional water conditions, and simple trial and error. Two equally experienced anglers can disagree meaningfully about line type, reel brand, or boot style and both be entirely correct for their own circumstances. Treat the recommendations in this guide as a well-tested starting point rather than an absolute rulebook, and don’t be afraid to deviate once your own on-water experience gives you a clearer sense of what actually works for how, where, and when you fish.
Throughout this guide, you’ll notice a recurring theme: nearly every gear decision comes down to matching the equipment to the specific conditions you’ll actually face, rather than chasing the most expensive or most talked-about option in a given category. A thoughtfully assembled mid-range kit that fits your real fishing habits will consistently outperform an expensive kit assembled without that same consideration. Keep that principle in mind as you work through each section below, and use the checklists provided as a practical, printable-style reference you can return to before every trip.

Quick start: If you only buy one thing today, a stocked tackle box with an assortment of hooks, weights, and lures gets you fishing immediately.
Shop Tackle Box Kits →1. Why a Fishing Gear Checklist Actually Matters
It’s tempting to treat gear lists as busywork — something for beginners who haven’t developed “feel” yet. In reality, even veteran guides run through a checklist before every charter, because forgetting one small item can turn a productive day into a wasted one. A missing net means lost fish at the boat. A missing sunscreen means a miserable drive home. A missing multi-tool means you can’t cut a wind knot out of your braid, and the trip effectively ends early.
There’s also a financial angle. Anglers who shop reactively — grabbing whatever’s on the shelf at a gas station bait shop because they forgot line at home — consistently overpay for underwhelming gear. A checklist built in advance lets you shop sales, compare options, and invest in quality where it counts (reels, line, boots) while saving money on items that don’t need to be premium (bobbers, basic weights, a bucket).
The Three-Tier Packing Method
Most experienced anglers organize their gear into three tiers, and this checklist follows that same structure throughout:
- Tier 1 — Non-negotiables: Rod, reel, line, hooks, a way to cut line, a net, and identification/license. Without these, you cannot legally or practically fish.
- Tier 2 — Comfort and efficiency: Proper footwear, sun protection, a tackle organization system, and pliers. These don’t stop you from fishing, but they stop you from fishing well or comfortably.
- Tier 3 — Specialized and situational: Electronics, kayak-specific gear, cold-weather layers, or saltwater-grade tackle. These depend entirely on where and how you fish.
Keep this tiered thinking in mind as you read — it’s the same logic we apply when prioritizing what to buy first if you’re building a kit from scratch.
How Trip Type Changes the Checklist
Not every fishing trip demands the same gear, and treating every outing as though it does is one of the fastest ways to end up with an overstuffed truck bed and an underused garage shelf. A two-hour evening session at a neighborhood pond calls for a fraction of what a multi-day boat trip to unfamiliar water requires. Before you even open a tackle box, it helps to ask three quick questions: How long will I be out? Am I fishing from the bank, a boat, or wading? And is the water familiar or new to me? The answers shape which tiers of gear actually matter for that specific day.
For a short, familiar outing, Tier 1 items alone are often enough — you already know the water, you’re not venturing far from the truck, and comfort items like elaborate sun protection matter less for a two-hour window. For an all-day trip on unfamiliar water, Tier 2 becomes essential, since you’ll be exposed to sun and weather for far longer and won’t have the local knowledge to compensate for missing electronics or navigation tools. Multi-day or specialized trips — a weekend kayak expedition, an ice-fishing outing, or a full day offshore — pull in Tier 3 gear almost by necessity, because the margin for improvisation shrinks as the environment gets less forgiving.
Building a Repeatable Packing Routine
Many experienced anglers keep a physical or digital packing list they reuse trip after trip, updating it only when their fishing style changes. This removes the guesswork and decision fatigue that leads to forgotten items, especially on early mornings when you’re packing half-asleep before sunrise. A simple approach is to keep a dedicated tote or duffel permanently stocked with Tier 1 and Tier 2 items, so the only thing you need to decide on for each trip is which Tier 3 specialty gear to add. This “always-ready base kit” philosophy is the same one professional guides use to turn around same-day charters without missing anything critical.
Over the course of this guide, we’ll return repeatedly to this idea of matching gear to context rather than blindly maximizing every category. A thoughtful, right-sized kit beats an exhaustive one that never gets used to its full potential — and it’s a lot easier to carry down to the water.
Common Packing Mistakes Worth Avoiding
Even experienced anglers fall into a handful of predictable packing traps. The most common is what might be called “kitchen sink” packing — bringing every lure, every rod, and every gadget owned, on the theory that more options can only help. In practice, this usually means more time spent digging through gear and less time with a bait actually in the water, along with a heavier, more cumbersome load to carry to the water’s edge. The opposite mistake, extreme minimalism driven by a desire to travel light, can leave you without a critical backup when something breaks or gets lost mid-trip — a single rod with no spare, for instance, turns a snapped tip into a trip-ending event rather than a minor inconvenience.
Another frequent oversight is packing gear that hasn’t been checked since the last outing. Reels left loaded with old, brittle line, first-aid kits missing supplies used on a previous trip and never restocked, and dead batteries in a headlamp or fish finder are all avoidable failures that a five-minute pre-trip gear check would catch. Building this quick inspection into your routine — ideally the night before rather than the morning of, when there’s still time to fix a problem — closes most of the gaps that otherwise show up at the worst possible moment.
Weather and Seasonal Adjustments to Your Base Kit
Even a well-built “always-ready” base kit benefits from seasonal review rather than staying static year-round. Cold-weather trips call for hand warmers, insulated layers, and often a change in line choice, since some monofilament lines become noticeably stiffer and more prone to coiling in freezing temperatures. Hot-weather trips shift priorities toward hydration, sun protection, and bait preservation, since both live bait and any kept catch spoil far faster in summer heat than in cooler months. Reviewing and swapping a handful of seasonal items twice a year — rather than carrying a single unchanging kit through every condition — keeps your gear genuinely matched to what you’ll actually face on a given day.

A dependable rod-and-reel combo is the foundation every other item on this list supports.
Browse Rod & Reel Combos →2. Rods and Reels: The Foundation of Every Trip
Your rod and reel are the single biggest factor in how enjoyable a day of fishing feels, and they’re worth thinking through carefully rather than grabbing the first combo you see. The right setup depends on target species, water type, and casting style — but a few general principles apply almost everywhere.
Rod Power and Action
“Power” describes how much force it takes to bend the rod, ranging from ultralight to heavy. “Action” describes where along the blank the bend happens — fast action bends mostly near the tip, while slow action bends through the whole rod. For most freshwater panfish and bass anglers, a medium-power, fast-action rod between 6’6″ and 7′ is the most versatile starting point.
| Rod Power | Best For | Typical Line Weight |
|---|---|---|
| Ultralight | Panfish, trout, small bait finesse fishing | 2–6 lb |
| Light / Medium-Light | Trout, crappie, walleye finesse presentations | 4–10 lb |
| Medium | Bass, walleye, catfish (smaller), inshore saltwater | 8–17 lb |
| Medium-Heavy | Bass with heavier cover, larger catfish, pike | 10–25 lb |
| Heavy / Extra-Heavy | Musky, big catfish, offshore saltwater | 20 lb+ |
Spinning vs. Baitcasting Reels
Beginners almost always start with spinning reels because they’re forgiving of casting mistakes and rarely backlash. Baitcasting reels offer more casting accuracy and better line control for heavier lures once you’ve built the technique, but they have a learning curve that can be frustrating for a first outing.
Spinning Reel Pros
- Easy to learn, minimal backlash risk
- Great for lightweight lures and finesse baits
- Affordable, widely available in all price ranges
Spinning Reel Cons
- Less casting accuracy at distance
- Line twist can build up over time
- Not ideal for very heavy lures or line
Baitcasting Reel Pros
- Superior accuracy for pitching and flipping
- Handles heavier line and lures with ease
- Better drag systems for fighting bigger fish
Baitcasting Reel Cons
- Steeper learning curve, backlash-prone at first
- Underperforms with very light lures
- Typically pricier for comparable quality
Matching Your Setup to Species
It’s worth resisting the urge to buy a single “do-everything” rod and reel, because the setups that handle panfish well tend to feel undergunned on bass, and setups built for bass often feel clumsy and overpowered for light panfish work. If your trips regularly mix species — say, panfish in the spring and bass through the summer — a two-rod system solves this more affordably than most anglers expect. A light or medium-light spinning combo covers panfish, trout, and finesse presentations, while a medium or medium-heavy combo, spinning or baitcasting, covers bass, walleye, and most general freshwater targets. Anglers chasing pike, musky, or larger catfish typically need a third, heavier setup, but that’s usually a later addition rather than a starting requirement.
Rod length matters almost as much as power and action. Shorter rods (under 6’6″) offer more control in tight, brushy conditions like small streams or heavily wooded pond banks, while longer rods (7′ and up) generate longer casts and better leverage for hooksets at distance — a meaningful advantage on open lakes or from a boat. If you fish a mix of tight and open water, a 6’6″ to 7′ rod splits the difference reasonably well and is the most common length recommended to beginners for exactly that reason.
Reel Maintenance Starts at Purchase
The gear ratio printed on a reel’s spool (something like 6.4:1) tells you how many times the spool rotates per single handle turn — higher ratios retrieve line faster, which suits reaction baits like spinnerbaits and crankbaits, while lower ratios provide more cranking power for slow, deliberate presentations like jigs and deep-diving crankbaits. Beginners rarely need to worry about optimizing this number precisely, but it’s useful to know when you eventually add a second or third reel to your rotation, since a mismatched gear ratio can make certain techniques feel unnecessarily tiring.
Drag Systems and Why They Matter
A reel’s drag system controls how much resistance line pulls against before it’s allowed to slip off the spool, and it’s one of the most under-appreciated components on any setup. A drag set too tight risks snapping line or pulling hooks free during a hard run, while a drag set too loose lets a fish take line so easily that you struggle to ever gain ground during the fight. A commonly used starting point is setting the drag to roughly a third of your line’s rated breaking strength, then adjusting based on feel once you’re actually fighting fish. Smooth, consistent drag performance — without sudden sticking or jerking under load — is one of the clearest signals of a quality reel, and it’s worth testing by pulling line directly off the spool by hand before you ever cast it for the first time.
Rod Material: Graphite vs. Fiberglass vs. Composite
Rod blanks are typically built from graphite, fiberglass, or a composite blend of the two, and each material brings a different feel to the water. Graphite rods are lightweight and extremely sensitive, transmitting even subtle bites and bottom contact clearly through the blank, which makes them a favorite for finesse techniques and light-line presentations. Fiberglass rods are heavier and less sensitive but far more durable and forgiving under sudden shock loads, which is why they remain popular for crankbait fishing and techniques where a slower, more parabolic bend helps keep hooks pinned during a fight. Composite rods attempt to blend these characteristics, offering a middle ground in sensitivity and durability that suits anglers who don’t want to maintain multiple specialized rods for different techniques.
One-Piece vs. Multi-Piece Rods
One-piece rods generally offer marginally better sensitivity and a more consistent bend since there’s no joint interrupting the blank, but their length makes them impractical for travel and awkward to store in smaller vehicles. Two-piece and multi-piece travel rods sacrifice a small, often imperceptible amount of sensitivity in exchange for dramatically easier transport and storage — a trade-off most anglers find well worth making once they’ve dealt with the hassle of fitting a full-length one-piece rod into a compact car or an airline travel case. Modern ferrule joint technology has closed much of the performance gap that once made two-piece rods feel noticeably inferior, so this decision today comes down mostly to storage and travel needs rather than meaningful performance loss.
Handle Materials and Grip Comfort
Rod handles are typically built from cork, EVA foam, or a combination of both, and the choice affects comfort over a long day more than most anglers expect before they’ve fished with both extensively. Cork offers excellent sensitivity transfer and a lighter overall weight but can wear and develop small pits over years of heavy use. EVA foam is more durable and often less expensive, with a slightly spongier feel that many anglers find more comfortable during long sessions of repetitive casting, such as extended topwater or crankbait fishing. Trying both handle types in person, if possible, before committing to a specific rod is a small step that pays off across hundreds of hours of eventual use.
- Primary rod and reel matched to target species
- Backup rod (even a cheap one saves a trip if the first breaks)
- Rod case or sleeve for transport
- Extra spool of matched line pre-loaded
- Small reel oil/grease kit for maintenance

Fresh line prevents more lost fish than any lure choice ever will — replace it before, not after, it fails.
Shop Fishing Line →3. Fishing Line, Leaders & Terminal Tackle
If rods and reels are the foundation, line is the single point of failure. Every hookset, every fight, every landed fish depends on line that hasn’t degraded from sun exposure, abrasion, or age. This section covers the three main line types and the small terminal tackle items that too many anglers forget until they’re standing at the water with an empty tackle tray.
Monofilament vs. Fluorocarbon vs. Braid
| Line Type | Stretch | Visibility | Best Use |
|---|---|---|---|
| Monofilament | High | Moderate | General-purpose, topwater, beginners |
| Fluorocarbon | Low | Very low (near-invisible underwater) | Leader material, clear water, finesse fishing |
| Braid | Very low | High (opaque) | Heavy cover, long casts, high sensitivity |
Many anglers now run a braided mainline with a fluorocarbon leader — combining braid’s sensitivity and casting distance with fluorocarbon’s low visibility near the hook. If you’re unsure where to start, 10–12 lb monofilament is the most forgiving all-purpose choice for freshwater.
Terminal Tackle: The Small Stuff That Ends Trips Early
Terminal tackle refers to everything between your line and your bait — hooks, weights, swivels, and bobbers. These items are cheap individually but disastrous to forget collectively.
- Assorted hooks (sizes 2 through 6/0 depending on target species)
- Split shot and egg sinkers in multiple weights
- Barrel swivels and snap swivels
- Bobbers/floats (fixed and slip styles)
- Bead stops for slip-bobber rigs
- Pre-tied leaders for quick changes
- Extra spool of both mainline and leader material
Knot Selection and Practice
Even the best line fails if it’s tied poorly. A weak or improperly seated knot is one of the most common — and most preventable — reasons anglers lose fish right at the moment of truth. The Palomar knot is widely considered the strongest and easiest general-purpose knot for attaching hooks, lures, and swivels, and it’s worth practicing at home, away from the pressure of a fish pulling on the other end, until it becomes automatic. For joining two different line types, such as a braided mainline to a fluorocarbon leader, an FG knot or a double uni knot both hold up well, though they take more repetitions to master smoothly.
It’s also worth wetting any knot with saliva or water before cinching it tight — dry friction generates heat that can weaken monofilament and fluorocarbon at the exact point where strength matters most. This is a small habit, but it’s one that separates anglers who consistently land bigger fish from those who lose them at the net with surprising regularity.
Hook Types and When Each One Earns a Slot in the Box
It’s easy to underestimate how much a properly chosen hook affects hookset reliability, since anglers tend to attribute a missed fish to timing or luck rather than to hook shape or gap size. Beyond generic “assorted hooks,” it’s worth understanding the handful of hook styles that cover almost every freshwater situation. Octopus hooks work well for live bait presentations thanks to their rounded shape and short shank. Circle hooks reduce deep-hooking and gut-hooking, making them a strong choice for catch-and-release fishing, since fish tend to hook themselves cleanly in the corner of the mouth as they swim away with the bait rather than requiring a hard hookset. Worm hooks, offset and wide-gapped, are purpose-built for rigging soft plastics weedless through heavy cover, while treble hooks come standard on many hardbaits and crankbaits and generally don’t need to be purchased separately unless you’re replacing a rusted or bent factory hook.
Weight Selection and Feel
Choosing the right weight isn’t just about sinking a bait to the correct depth — it’s also about maintaining enough contact with your presentation to feel strikes and bottom structure clearly. Too light a weight in current or wind leaves your bait drifting out of the strike zone; too heavy a weight can make a natural presentation feel unnaturally fast or stiff, especially with finesse soft plastics. Carrying a genuine range — from small split shot for finesse presentations up through heavier weights for current or depth — lets you adjust on the water rather than forcing a single weight to do a job it isn’t suited for.
Line Diameter and Spool Capacity
Heavier line has a larger diameter, which means less of it fits on a given reel spool and it casts with slightly more wind resistance and less distance. This is one of the main reasons experienced anglers prefer braided line for situations demanding long casts or heavy cover — braid’s thin diameter-to-strength ratio lets you spool heavier practical strength without sacrificing casting distance or spool capacity. When in doubt about which diameter to choose, check your reel’s spool capacity rating (usually printed on the spool itself) and match it against the line weight you’re considering before you buy in bulk.

A well-rounded lure selection covers more water conditions than any single “miracle bait” ever will.
Shop Lure Assortments →4. Lures, Baits & Tackle Box Essentials
New anglers often over-buy lures based on flashy packaging rather than function. A tighter, purpose-built selection covers more scenarios and takes up far less space. Below is a breakdown by category, along with when each style earns its place in the box.
Core Lure Categories
- Soft plastics (worms, creature baits, swimbaits): Versatile, affordable, and effective almost everywhere; rig weedless in heavy cover.
- Crankbaits: Cover water fast and imitate fleeing baitfish; choose shallow and deep-diving versions.
- Spinnerbaits and chatterbaits: Excellent in stained water and around cover thanks to vibration and flash.
- Topwater lures: Deadly during low-light hours (dawn/dusk) when fish feed near the surface.
- Jigs: Arguably the most versatile lure category, effective from shallow flats to deep structure.
Live and Cut Bait
Live bait remains unbeatable for many species, particularly panfish, catfish, and walleye. If you’re bringing live bait, plan for its care as seriously as you plan for your tackle: an aerated bait bucket, a bait net, and a way to keep bait cool are essential rather than optional.
- Soft plastic assortment with weedless hooks
- 2–3 crankbaits (shallow and deep divers)
- Spinnerbait or chatterbait for stained water
- At least one topwater lure
- Jig heads in multiple weights
- Live bait container with aeration (if applicable)
- Bait net or scoop
- Tackle tray or box with adjustable compartments
Color Selection Without Overthinking It
Lure color debates can consume entire fishing forums, but a simplified rule covers most conditions well: use natural, translucent colors (shad, natural greens, subtle browns) in clear water and bright sunlight, and switch to darker or higher-contrast colors (black, junebug, chartreuse) in stained or muddy water where fish rely more on silhouette and vibration than fine visual detail. Low-light conditions at dawn and dusk often reward dark colors regardless of water clarity, since they create a stronger silhouette against the brighter sky above. This single rule of thumb eliminates a huge amount of unnecessary lure-buying and lets you build a smaller, more purposeful color selection within each lure category.
Matching Bait Size to Forage
One of the most overlooked adjustments anglers can make is sizing their lure or bait to match the size of the natural forage fish are actively keying in on, rather than defaulting to whatever size happens to be in the box. If small shad or fry are visibly present near the surface, downsizing your presentation often produces more strikes than a larger, flashier option would. Carrying at least two size variations within your core lure categories — a standard size and a downsized “match the hatch” option — solves this without requiring an entirely separate tackle box.
Rigging Methods for Soft Plastics
The same soft plastic bait can be rigged several different ways, each suited to a different type of cover and depth. A Texas rig, with the hook point buried back into the plastic body, is nearly weedless and excels in heavy vegetation or brush where an exposed hook would constantly snag. A Carolina rig separates the weight from the bait with a leader, letting the plastic float more naturally off the bottom — a strong choice for covering open, sparse-cover water methodically. A wacky rig, with the hook pierced through the middle of a straight worm, creates a subtle, fluttering fall that often triggers strikes from fish that have ignored more aggressive presentations. Knowing these three rigging styles, and carrying the terminal tackle needed for each, effectively multiplies the versatility of a fairly small soft plastic selection.
Storing Soft Plastics Without Ruining Them
Soft plastic baits can react chemically with certain plastics, causing them to melt, stick together, or leach color into other lures stored in the same compartment. Using tackle trays specifically designed for soft plastics — or keeping them in their original resealable packaging — prevents this slow degradation, which otherwise turns a promising bait selection into a fused, unusable clump by mid-season. It’s a small storage detail, but replacing melted soft plastics is a completely avoidable, recurring cost for anglers who overlook it.
Scent and Attractant Additives
Many anglers supplement their soft plastic and live bait presentations with scent additives, which can meaningfully increase how long a fish holds onto a bait before spitting it out — extending the crucial window during which you have time to feel the bite and set the hook. Gel and spray-on attractants applied directly before casting tend to wash off relatively quickly, while pre-scented soft plastics or dip-style attractants hold their scent through more casts before needing to be reapplied. This is a low-cost addition to a tackle bag that many anglers find worth the extra few dollars, particularly in pressured waters where fish have grown wary of purely visual presentations.
Building a Confidence Bait Rotation
Beyond covering technical categories, it’s worth deliberately identifying two or three “confidence baits” — lures you’ve personally had consistent success with — and making sure they’re always stocked and in good condition before every trip. Confidence matters more in fishing than many anglers give it credit for: a bait you trust gets fished more thoroughly, more patiently, and with better technique than one you’re using half-heartedly while waiting to switch to something else. Rotating in new lure categories to experiment with is worthwhile for long-term growth, but your core confidence baits should always be present as a reliable fallback when conditions turn tough.

Modern fish finders can turn a slow day into a productive one by revealing structure and baitfish you’d otherwise miss.
Shop Fish Finders →5. Fish Finders & Electronics
Electronics used to be reserved for serious boat anglers, but affordable, portable units have made fish finders accessible to almost anyone — including kayak and shore anglers using clamp-on or castable models. If you’re new to using one, our guides on how to read a fish finder and how to use a fish finder walk through interpreting sonar returns and setting up your unit correctly, which matters far more than which brand you buy.
Choosing Between the Major Brands
The three dominant names in consumer fish finders each have distinct strengths, and our detailed Garmin vs. Lowrance vs. Humminbird comparison breaks down screen quality, mapping ecosystems, and transducer options in depth. As a quick overview:
| Brand | Known For | Best For |
|---|---|---|
| Garmin | Mapping integration, build quality | Anglers who also use Garmin GPS/chartplotters |
| Lowrance | User interface, networking with other electronics | Boat owners running multiple linked displays |
| Humminbird | Imaging clarity (side/down imaging) | Structure and ledge fishing in clear water |
If you’re deciding whether a dedicated fish finder is even necessary versus a simpler depth finder, our fish finder vs. depth finder comparison explains the functional differences and price gap between the two categories.
Popular Entry and Mid-Range Models
For anglers narrowing down a specific unit, we’ve published in-depth reviews of the most popular options at each price point: the Humminbird Helix for anglers wanting best-in-class imaging, the Lowrance Hook Reveal as a well-rounded mid-tier choice, and the Garmin Striker 4 as one of the most affordable ways to get GPS-enabled sonar on a small boat or kayak. For a broader roundup across budgets, see our best fish finder guide.
- Fish finder unit matched to your boat/kayak size
- Transducer and mounting hardware
- Portable power source (battery or power bank) for kayak setups
- Waterproof phone case if using a mapping app
- Backup paper map or offline GPS app for dead zones
Understanding Sonar Frequencies
Most modern fish finders offer multiple sonar frequencies, and understanding the basic trade-off between them helps you get far more value out of any unit you buy. Lower frequencies (around 50 kHz) send a wider cone and penetrate deeper water, making them useful for offshore or very deep lake fishing, but they sacrifice fine detail. Higher frequencies (200 kHz and above) produce a narrower, more detailed cone that’s excellent for shallow-to-mid-depth freshwater fishing but loses effectiveness in very deep water. CHIRP sonar, now standard on most mid-range and higher units, sweeps across a range of frequencies simultaneously, giving you sharper target separation than older single-frequency sonar without requiring you to manually switch settings throughout the day.
Side and Down Imaging
Beyond traditional sonar, many units now include side-imaging and down-imaging technology, which renders a photograph-like view of structure, vegetation, and even individual fish rather than the traditional arch-based display. This is especially valuable for identifying subtle structure — a submerged stump field, a rock pile, or a creek channel edge — that traditional sonar might only hint at. If you’re deciding how much to spend on your first unit, imaging capability is often the single biggest factor separating entry-level and mid-range price points, and it’s worth prioritizing over extra screen size or mapping detail if budget forces a trade-off.
Mounting Considerations for Small Boats and Kayaks
A fish finder is only as useful as its transducer placement allows it to be. Transom-mounted transducers are the simplest option for small boats but can introduce turbulence interference at higher speeds if mounted too close to the motor’s prop wash. Through-hull and in-hull mounts avoid this issue but require more permanent installation and aren’t practical on most rented, borrowed, or resale-focused boats. Kayak anglers have their own set of considerations, often mounting a transducer inside a scupper hole or on a track-mounted arm, both of which avoid drilling into the hull entirely — a meaningful advantage for anglers who don’t want to compromise resale value or hull integrity on a relatively young kayak.
Battery and Power Planning
Fish finders, especially larger units with bigger screens and GPS mapping, draw more power than many first-time buyers expect, and running one off an undersized or aging battery is a common source of mid-trip frustration. For boats, a dedicated marine battery separate from the engine’s starting battery prevents the frustrating scenario of a dead cranking battery at the end of a long day of electronics use. Kayak anglers typically rely on a small sealed lead-acid or lithium battery sized specifically to their unit’s power draw and trip length, and it’s worth calculating expected runtime before a long trip rather than discovering a dead screen halfway through the day.

Dry, supported feet make the difference between a full day on the water and an early retreat to the truck.
Shop Fishing Boots →6. Footwear: Boots and Waders
Footwear is one of the most under-planned categories on any fishing gear checklist, yet it directly determines how long you can comfortably stay out. Cold, wet feet end trips faster than almost anything else on this list. The right choice depends heavily on whether you’re wading, standing on a boat deck, or hiking to a remote bank.
Boots vs. Waders vs. Wet-Wading Shoes
Ankle-height rubber boots suit muddy banks and boat decks where you won’t be submerged past the ankle. Chest or hip waders are necessary once you’re stepping into moving water above boot height, particularly in cooler months. In warm weather, many anglers skip waders entirely and “wet wade” in quick-drying shoes designed to drain and dry fast.
| Footwear Type | Best Conditions | Comfort Trade-off |
|---|---|---|
| Rubber boots | Muddy banks, boat decks, cool weather | Warm but can overheat in summer |
| Chest waders | Deep wading, cold rivers, spring/fall | Most protection but least breathable |
| Wet-wading shoes | Warm-weather streams, summer wading | Cool and light but feet get wet |
We’ve tested several popular options in detail. The Frogg Toggs boots review covers a budget-friendly line that performs well for casual bank fishing, while the Compass 360 boots review looks at a mid-range option built for more serious wading. If you want waders and boots designed for technical river fishing, our Orvis wading boots review is worth reading before you invest in a premium pair. For a side-by-side ranking across price tiers, check our best fishing boots guide.
Felt Soles
- Superior grip on slick, algae-covered rocks
- Popular with river and stream anglers
Rubber Soles
- Better on mixed terrain (mud, boat decks, trails)
- Doesn’t spread invasive species between waterways as easily
- Primary boots or waders matched to your typical water
- Backup dry socks (wool blends dry faster and insulate wet)
- Wading belt (mandatory safety item with chest waders)
- Traction aids (studs or cleats) for slick rock
Getting the Fit Right
Ill-fitting boots or waders cause blisters, cramping, and circulation problems well before they cause any obvious injury, and anglers often tolerate a poor fit far longer than they should simply because they don’t realize how much it’s affecting their day. When trying on wading boots, always do so with the socks (or wader booties) you’ll actually be wearing on the water, since sizing charts based on bare feet or thin dress socks routinely run too small once thermal socks or neoprene booties are added underneath. A thumb’s width of space at the toe, combined with a snug but not restrictive fit around the ankle, is the general target most outdoor footwear specialists recommend.
Caring for Waders Between Trips
Waders are one of the more expensive individual items on this checklist, and their lifespan depends heavily on post-trip care. Rinsing waders with fresh water after every outing — especially after saltwater or heavily silted freshwater use — prevents grit from working into seams and boot-foot connections where it can accelerate wear. Hanging waders fully inverted to dry, rather than folding them away damp, prevents the mildew smell that ruins an otherwise perfectly functional pair well before they’ve reached the end of their practical life.
Neoprene vs. Breathable Waders
Neoprene waders trap body heat effectively and offer built-in cushioning, making them a strong choice for cold-water conditions where warmth matters more than breathability, such as late-fall river trips or early-spring outings before water temperatures climb. Breathable waders, built from laminated fabrics rather than neoprene, allow sweat vapor to escape while still blocking outside water, making them far more comfortable across a wider range of temperatures and for longer, more active days of wading and hiking between spots. Most serious anglers eventually own a pair of each, but if budget only allows for one, breathable waders paired with an appropriate base layer underneath generally offer more year-round versatility than neoprene alone.
Preventing Slips Before They Happen
Slick, algae-covered rocks are one of the leading causes of wading injuries, and the right sole choice matters more than most anglers realize until they’ve experienced a bad fall firsthand. Felt soles remain popular specifically because they grip slick rock surfaces better than rubber in most conditions, though some regions restrict felt soles due to concerns about transporting invasive aquatic species between waterways in the porous felt material. Studded rubber soles offer a felt-free alternative with strong grip on rock, while a simple wading staff adds a valuable third point of contact in fast or uneven currents regardless of which sole type you choose.

Sun exposure adds up fast on open water — good apparel is protective gear, not an accessory.
Shop Fishing Apparel →7. Apparel and Sun Protection
Between reflected sunlight off the water and hours of continuous exposure, anglers face some of the highest cumulative UV exposure of any outdoor hobbyist. Proper apparel isn’t about looking the part — it’s genuinely protective gear that prevents sunburn, heat exhaustion, and long-term skin damage.
Layering for Changing Conditions
Weather on the water changes faster than on land, especially near dawn and dusk when temperatures swing and wind picks up. A simple layering system covers most situations without overpacking:
- Base layer: Moisture-wicking synthetic or merino wool shirt to manage sweat.
- Sun layer: UPF-rated long-sleeve fishing shirt, even on cool days — clouds don’t block UV as much as people assume.
- Insulating layer: Light fleece or softshell for early morning or cooler months.
- Shell layer: Packable rain jacket, because weather can turn with little warning near open water.
Polarized Sunglasses: Non-Negotiable
Polarized lenses cut glare off the water’s surface, letting you spot structure, fish, and drop-offs that are otherwise invisible. This isn’t a luxury item — it’s functional gear that directly improves how many fish you catch by letting you sight-fish and read water conditions.
- UPF-rated long-sleeve shirt
- Wide-brim hat or cap with neck flap
- Polarized sunglasses with a retention strap
- Broad-spectrum sunscreen (reapplied every 2 hours)
- Lightweight rain shell
- Fingerless fishing gloves for line handling and sun protection
- Buff or neck gaiter
Why Fabric Choice Matters More Than It Seems
Cotton is a poor choice for on-water apparel despite being a wardrobe staple everywhere else, because it absorbs and holds moisture rather than wicking it away, leaving you damp and prone to chafing for the rest of the day once it gets wet — whether from sweat, splash, or a sudden rain shower. Synthetic blends and merino wool both dry significantly faster and continue insulating even when damp, which matters more than most anglers expect during long days that start cold and warm up, or vice versa. Fishing-specific apparel brands build UPF ratings directly into these same quick-dry fabrics, effectively combining sun protection and moisture management into a single garment rather than requiring separate solutions.
Hydration and Heat Management
Apparel decisions extend beyond what you wear to how you manage your body temperature throughout a long trip. A hydration pack or simply a well-insulated water bottle prevents the slow, easy-to-miss dehydration that creeps in over hours spent in direct sun and wind, which in turn affects focus, reaction time on hooksets, and overall enjoyment. Pairing adequate hydration with the UPF and layering strategy discussed above rounds out a genuinely protective, rather than purely aesthetic, approach to fishing apparel.
Choosing Lens Colors for Polarized Sunglasses
Not all polarized lenses perform identically across conditions, and lens tint is worth a second thought beyond simply picking a color you find visually appealing. Amber and copper tints enhance contrast in low-light or overcast conditions and are a strong general-purpose choice for freshwater fishing. Gray lenses reduce overall brightness without shifting color perception much, making them well suited to bright, sunny days on open water where glare reduction matters more than contrast enhancement. Yellow lenses brighten flat, low-light conditions such as heavy overcast or dawn and dusk sessions but perform poorly in bright midday sun, where they can actually increase discomfort from overexposure. Many anglers eventually keep two pairs — an amber or copper pair for general use and a specialized pair for particularly bright or particularly dim conditions.
Insect Protection
Depending on region and season, biting insects can turn an otherwise pleasant evening session into a miserable one, and it’s worth treating insect protection as part of the same category as sun protection rather than an afterthought. Permethrin-treated clothing offers longer-lasting protection than topical repellent alone and holds up through multiple washes, making it a worthwhile investment for anglers who frequently fish dawn, dusk, or heavily wooded banks where mosquitoes and ticks are most active. A lightweight head net folds down small enough to live permanently in a tackle bag and earns its keep on the handful of trips each season when insect pressure becomes genuinely unbearable without one.

Hook removal tools and a basic first-aid kit take up almost no space but solve the most common on-water injuries.
Shop Safety Gear →8. Safety and First-Aid Gear
Safety gear is the category most anglers skip until something goes wrong — a treble hook buried in a finger, a slip on wet rocks, or an unexpected storm rolling in. None of these items are exciting to pack, but each one solves a real, common problem.
Water Safety Basics
If you’re fishing from any vessel, a properly fitted personal flotation device (PFD) is both a legal requirement in most jurisdictions and simple common sense. Inflatable PFDs designed specifically for anglers are far less bulky than traditional foam vests and don’t interfere with casting.
On-Body First Aid
Hook injuries are the most common on-water mishap. A basic understanding of how to back a hook out (or push-and-cut it through when barbed) paired with antiseptic wipes and adhesive bandages handles the vast majority of incidents without needing a trip to urgent care.
- Personal flotation device (PFD) suited to your activity
- Compact first-aid kit (bandages, antiseptic, tweezers, gauze)
- Fishing pliers with a hook-cutting notch
- Whistle or signaling device
- Headlamp with spare batteries for dawn/dusk trips
- Emergency space blanket
- Fully charged phone in a waterproof pouch
- Valid fishing license and ID
Trip Planning as a Safety Measure
The single most effective piece of “safety gear” costs nothing: telling someone where you’re going and when you expect to be back. Whether it’s a text to a family member before you launch a kayak or a written note left on the dashboard for a solo bank-fishing session, this simple habit dramatically reduces response time if something does go wrong. It’s especially important for anglers fishing alone, wading unfamiliar rivers, or heading out in a kayak, where a minor mishap like a capsize or a twisted ankle on slick rocks can become serious if help doesn’t know where to start looking.
Weather Awareness
Checking a detailed marine or local weather forecast before departure — not just a general daily forecast — helps you anticipate wind shifts, incoming storm cells, and temperature swings that a generic app icon won’t capture. Lightning is a particular concern on open water and around graphite rods, which conduct electricity efficiently; if you hear thunder, the safest response is to get off the water immediately rather than waiting to see if the storm passes nearby. Building weather-checking into your pre-trip routine, right alongside packing your tackle box, closes one of the more serious and preventable safety gaps anglers face.
Handling Fish Safely — For You and the Fish
Safety gear isn’t limited to protecting anglers from the environment; it also covers handling fish in ways that prevent injury on both ends. Fish grippers let you lift toothy or spiny species without risking a puncture wound, while a rubberized landing net protects a fish’s slime coat better than older knotted mesh designs, improving survival odds for anything you plan to release. Long-nose pliers remain essential not just for removing hooks but for safely handling species like catfish or pike that can injure an unprepared hand far more easily than most freshwater panfish or bass.
Building a Trip-Specific Emergency Plan
Beyond generic first-aid supplies, it’s worth thinking through what an emergency response actually looks like for your specific fishing location before you need it. Cell service can be unreliable on remote lakes, deep canyons, or far offshore, which makes knowing the nearest access point, the nearest road, or the nearest marina in advance genuinely useful rather than theoretical. For remote trips beyond reliable cell coverage, a satellite messenger device offers a meaningful safety upgrade over a phone alone, allowing you to send a distress signal or check-in message even where standard networks don’t reach.

A dependable cooler keeps bait fresh on the way in and your catch fresh on the way home.
Shop Coolers →9. Coolers, Storage & Bait Care
Storage gear rarely gets the spotlight, but it determines whether your bait stays lively, your catch stays fresh, and your tackle stays organized instead of tangled into a single knotted mess by the end of the trip.
Choosing the Right Cooler Setup
Most serious anglers run two coolers: one dedicated to food and drinks (opened frequently, less ice-retention-critical) and one dedicated to bait or catch (opened rarely, needs to hold cold for hours). Mixing the two means constant temperature swings that shorten bait life and speed up catch spoilage.
Tackle Storage Systems
Tackle bags with modular, swappable trays let you bring only the categories of lures relevant to a given trip instead of hauling your entire collection. Waterproof dry boxes protect electronics, wallets, and phones from splash and rain.
- Separate coolers for food/drinks and bait/catch
- Ice packs or block ice (lasts longer than cubed ice)
- Aerated bait bucket for live bait
- Modular tackle bag with swappable trays
- Waterproof dry box for phone, wallet, keys
- Fish stringer or livewell for catch-and-keep trips
- Trash bag for packing out line and wrappers
Keeping Bait Alive Longer
Live bait mortality is almost always a temperature and oxygen problem rather than a “bad batch” problem. Bait kept in water that’s too warm burns through dissolved oxygen far faster, which is why experienced anglers add ice (in a sealed bag, never directly into the bait water) to gradually lower the temperature rather than shocking the bait with a sudden drop. Battery-powered aerators extend bait life considerably longer than a sealed, unaerated container, and they’re inexpensive enough that the cost is easily recovered the first time you avoid a mid-morning bait shop run.
Preserving Your Catch for the Table
If you’re keeping fish to eat, getting them onto ice quickly — ideally within minutes of the catch rather than hours later in a warm livewell — has a bigger impact on final table quality than almost any other single factor, including how the fish is eventually cooked. A dedicated catch cooler with a slush of ice and water chills fish faster and more evenly than dry ice alone, and it’s worth the small extra effort of pre-chilling this cooler before you even leave the dock.
Organizing Tackle for Fast Access
Beyond simply keeping lures from tangling, a good tackle organization system should let you find and swap presentations within seconds, not minutes, since fishing windows around a feeding bite are often brief. Clear, labeled trays organized by lure category rather than by color or brand let you scan quickly under pressure, and keeping your most frequently used categories in the top or most accessible tray rather than buried at the bottom of a bag saves real time over the course of a season. A separate, smaller “go bag” tray with your most productive, confidence-inspiring lures for the current season is a habit many experienced anglers swear by for exactly this reason.
Rust Prevention in Humid or Coastal Storage
Metal terminal tackle — hooks, weights, swivels — is particularly vulnerable to rust in humid garages, coastal environments, or tackle boxes that get splashed and then sealed shut before fully drying. A light coat of rust-preventive spray on rarely used hooks, along with rinsing and thoroughly drying tackle trays before closing them for storage, prevents the slow accumulation of rust that otherwise renders an entire tray of hooks unusable by the time you reach for them again next season. Silica gel packets tucked into tackle boxes stored long-term absorb ambient moisture and provide cheap, low-effort insurance against this exact problem.
Transporting Gear Safely Between Trips
How gear rides in a vehicle between the garage and the water matters more than it might seem. Rods stored loose in a truck bed or trunk are prone to tip damage from shifting cargo, while reels left loaded in a tackle bag that gets tossed around can suffer bent bails or damaged handles well before they ever touch the water. A dedicated rod rack, even a simple foam-lined one mounted inside a vehicle, and a rigid-sided tackle bag rather than a soft, unstructured one both go a long way toward making sure gear arrives at the water in the same condition it left home in — rather than needing repair before the first cast of the day.
Protecting Gear from Sun and Heat in Storage
Between trips, where and how gear is stored matters nearly as much as how it’s used on the water. Direct sunlight and high heat — inside a closed vehicle trunk over a summer afternoon, for instance — accelerate the breakdown of fishing line, degrade soft plastic baits, and can even warp certain rod components over repeated exposure. Storing tackle bags and rods in a cool, dry, shaded space between outings, rather than leaving them baking in a vehicle “just in case,” meaningfully extends the working life of nearly everything covered in this checklist.

A multi-tool and a small maintenance kit keep your gear performing all season instead of degrading after one trip.
Shop Fishing Tools →10. Cleaning, Maintenance & Tools
Gear that isn’t maintained fails at the worst possible moment — usually mid-fight with the best fish of the day. A small maintenance kit, used consistently, extends the life of rods, reels, and line far beyond what most anglers expect.
Post-Trip Reel Care
Saltwater is especially corrosive, but even freshwater trips introduce grit and grime into reel bearings over time. A quick rinse with fresh water (never a direct high-pressure spray into the reel body), followed by light lubrication of moving parts, prevents the gradual stiffness and corrosion that shortens a reel’s lifespan.
Line Management Tools
Line clippers, knot-tying tools, and a small hook file keep your terminal tackle sharp and your knots clean — both of which directly affect hookup and landing rates.
- Multi-tool with pliers, scissors, and hook remover
- Line clippers or nail clippers as a backup
- Small reel oil and grease kit
- Hook file for sharpening dulled points
- Microfiber cloth for lenses and electronics
- Spare line spools for quick re-spooling
- Rod tip repair kit for emergency field fixes
A Simple End-of-Season Routine
Beyond post-trip touch-ups, gear benefits from a more thorough once-a-season inspection before it gets packed away for storage or handed a break during the off-season. This is a good time to fully strip and re-lubricate reels, inspect rod guides for hairline cracks that can shred line without warning, replace any terminal tackle that’s shown signs of rust, and re-spool reels that have seen heavy use rather than waiting until line fails mid-season. Storing rods vertically or in padded cases, rather than leaning them loosely in a corner, prevents the slow warping that flattens rod action over years of storage.
When to Retire Gear Instead of Repairing It
Not every maintenance issue is worth fixing. A reel with persistent grinding in the main gear, a rod with a repaired-but-weakened tip section, or line that’s been re-spooled so many times the diameter consistency is in question are all reasonable candidates for replacement rather than repeated patching. Knowing when to retire gear — rather than continuing to sink small repair costs into something past its useful life — is itself a maintenance skill worth developing over a few seasons of ownership.
DIY Field Repairs Worth Learning
A handful of simple repairs are worth practicing at home before you need them urgently on the water. Re-tying a lost guide wrap with thread and a drop of rod finish can extend a rod’s usable life after minor damage. Replacing a bent or rusted treble hook on a favorite crankbait, rather than retiring the entire lure, is a quick fix that restores a proven bait to working condition. Learning to re-tie your primary knots quickly and confidently, even in poor light or cold hands, might be the single most valuable field skill on this entire list, since it’s the repair you’ll actually need most often, trip after trip.
Keeping a Maintenance Log
For anglers with a larger collection of rods and reels, a simple maintenance log — even just a note on a phone — noting when each reel was last serviced and when each rod’s line was last replaced prevents the common mistake of over-servicing gear that’s barely been used while neglecting a workhorse combo that’s seen twenty trips since its last cleaning. This kind of lightweight tracking system takes minutes to set up and pays for itself the first time it catches a maintenance gap before it turns into a lost fish or a mid-trip failure.

Specialized trips need specialized gear — a kayak or ice-fishing kit looks very different from a standard bank setup.
Shop Kayak Fishing Gear →11. Specialized Checklists: Kayak, Ice, and Saltwater
The core categories above apply to nearly every fishing trip, but three situations call for meaningfully different equipment: kayak fishing, ice fishing, and saltwater fishing. Each comes with its own risks and its own gear priorities.
Kayak Fishing Additions
- PFD rated specifically for paddle sports (higher mobility in the shoulders)
- Paddle leash to prevent losing your paddle mid-fight
- Compact, clamp-mount fish finder built for kayak power limitations
- Anchor system or drift sock for wind management
- Waterproof deck bag for essentials within arm’s reach
Ice Fishing Additions
- Ice auger (hand or gas-powered) sized to your typical ice thickness
- Ice cleats for boot traction on slick surfaces
- Ice fishing shelter or portable shanty for wind protection
- Insulated, floating gear bag in case of thin-ice incidents
- Ice picks worn around the neck for self-rescue
Saltwater Fishing Additions
- Corrosion-resistant reels rated specifically for saltwater use
- Heavier abrasion-resistant leader material (fluorocarbon or wire)
- Rod and reel rinse routine after every single outing, no exceptions
- Tide chart or app for timing feeding windows
- Sun gloves — saltwater exposure and glare are both more intense
No matter which specialized style you’re gearing up for, the electronics and footwear principles from earlier sections still apply — just adjust the specific products for water type and mounting constraints. If you’re outfitting a boat or kayak with sonar, revisit our best fish finder guide for portable and clamp-mount recommendations.
Fly Fishing Considerations
Fly fishing sits somewhat apart from the conventional gear discussed throughout this guide, since it relies on a fundamentally different casting system and terminal setup. A fly rod and matched fly reel, weight-forward fly line, tapered leaders, and a well-organized fly box replace the spinning or baitcasting combo and lure box covered earlier. Waders and wading boots remain just as important — arguably more so, since fly anglers typically spend more continuous time standing in moving water than conventional bank or boat anglers do. If fly fishing is a direction you’re exploring, treat it as its own specialized checklist branch rather than trying to retrofit conventional gear to the technique.
Surf and Beach Fishing Additions
Surf fishing introduces its own set of environmental challenges that a standard freshwater checklist doesn’t address. A longer, heavier surf rod is needed to cast past breaking waves and hold bottom rigs against strong current, while a sand spike lets you set a rod down securely without it sliding away as waves roll in and out. Corrosion resistance becomes critical for every metal component, from reel bearings to hook points, since saltwater and airborne salt spray attack unprotected metal far faster than most anglers expect. A simple beach cart solves the very real challenge of hauling coolers, rods, bait, and a chair a significant distance across soft sand, which is a far more physically demanding carry than most inland fishing access points require.
Backcountry and Hike-In Trips
Fishing spots reachable only by a significant hike call for a genuinely pared-down kit, since every extra pound has to be carried in and back out under your own power, often over uneven terrain. A compact, packable rod and reel combo, a slimmed-down single tackle box rather than a full bag, and a lightweight day pack with just the safety essentials — water, a basic first-aid kit, and a way to signal for help — replace the more expansive setups appropriate for drive-up or boat access locations. Backcountry trips reward anglers who’ve genuinely internalized the tiered packing philosophy from earlier in this guide, since there’s little room for “just in case” items that never leave the bottom of the pack.
Family and Beginner-Focused Trips
Trips built around introducing kids or first-time anglers to the sport benefit from a slightly different gear emphasis than trips focused purely on catching numbers or trophy fish. Simplified, snag-resistant rigs (bobber-and-bait setups rather than technical lure presentations), extra sun protection sized for smaller bodies, plenty of snacks and water, and realistic expectations about attention spans all matter more than tackle sophistication. A short, successful, low-frustration outing does more to build a lifelong angler than a long, technically demanding trip that ends in boredom or sunburn.
Shore and Pier Fishing Setups
Shore and pier fishing deserves its own brief mention, since it’s how a huge share of anglers spend most of their time on the water, often without a boat or kayak at all. A longer rod — sometimes 8 to 10 feet — helps achieve casting distance from a fixed shore position where wading or repositioning isn’t an option. A rolling tackle cart or a sturdy backpack-style tackle bag matters more here than on boat trips, since everything you bring has to be physically carried to the spot and back, sometimes over a significant distance. Pier anglers in particular benefit from a drop net for landing fish from elevated platforms where a standard long-handled net can’t reach the water below.
Traveling With Fishing Gear
Anglers planning a fishing-focused vacation face a unique packing challenge: fitting a functional kit into airline luggage restrictions or a rental car trunk without sacrificing the gear that actually matters for the destination’s target species. Travel rod cases with multi-piece breakdown rods solve the length problem for air travel, while a scaled-down, destination-specific tackle selection — rather than an entire home tackle collection — keeps checked baggage weight and rental car space manageable. Researching regional regulations and locally effective techniques ahead of time, rather than assuming home-water tactics will transfer directly, also saves valuable time once you’ve actually arrived.
Multi-Day Trips and Camp-Based Fishing
When fishing is combined with an overnight camping trip, gear planning has to account for both activities without either one crowding out the other in terms of pack space or vehicle capacity. A dedicated dry bag for fishing gear keeps tackle separate from camp cooking equipment and clothing, reducing the chance of a hook or lure damaging something else in a shared pack. Planning meals around any fish you expect to catch and keep — bringing appropriate seasoning, a small cutting board, and cooking oil, for instance — turns a successful catch into an easy camp dinner rather than a missed opportunity because the right supplies were left at home. It’s also worth packing a spare set of dry clothes sealed away specifically for the evening, separate from whatever gets wet or muddy during the day’s fishing, so camp life doesn’t end up as damp and uncomfortable as the water itself.

You don’t need every item on this list on day one — build outward from the essentials as your trips get more ambitious.
Shop Starter Bundles →12. Building Your Kit on a Budget
Full gear checklists can look overwhelming — and expensive — when read all at once. The good news is that almost no experienced angler bought everything on this list before their first trip. Instead, kits are built incrementally, prioritized by what actually limits your ability to fish, not by what looks impressive in a photo.
What to Buy First
Start with Tier 1 items from Section 1: a single reliable rod-and-reel combo, a modest terminal tackle assortment, a net, and a valid license. This alone gets you on the water and fishing effectively for the vast majority of freshwater situations.
What to Buy Next
Once you’re fishing regularly, invest in comfort and efficiency items — proper footwear, sun protection, and a functional tackle storage system. These items don’t stop you from fishing, but they stop you from wanting to keep doing it, which matters just as much for long-term enjoyment.
What Can Wait
Electronics, specialized kayak or ice gear, and premium reels can all wait until you know exactly how and where you’ll be fishing most often. Buying a $400 fish finder before you’ve confirmed you enjoy boat fishing is a common — and expensive — beginner mistake.
| Budget Tier | Approximate Spend | Priority Items |
|---|---|---|
| Starter | $50–150 | Combo rod/reel, terminal tackle, license, basic net |
| Comfortable | $150–400 | Footwear, apparel, tackle bag, safety kit |
| Advanced | $400+ | Electronics, premium reels, specialized kayak/ice/saltwater gear |
However you choose to phase your purchases, the checklist structure stays the same — it’s simply a matter of when each category gets filled in.
Buying Used vs. New
Rods, reels, and even some electronics hold up reasonably well on the secondhand market, and buying used is one of the most effective ways to stretch a tight fishing budget without sacrificing quality outright. Reels are generally safer secondhand purchases than rods, since wear on a reel’s drag and bearings is often repairable, while a rod with a hidden hairline crack near the tip can fail unexpectedly under load. When buying used electronics, prioritize sellers who can demonstrate the unit powering on and displaying sonar returns, since internal transducer or wiring issues aren’t always visible from photos alone.
Seasonal Sales and Timing Purchases
Fishing gear, like most outdoor equipment, follows predictable seasonal discount patterns. Apparel, footwear, and general tackle often see meaningful markdowns at the end of a fishing season as retailers clear inventory ahead of next year’s models, while electronics tend to see steeper discounts around major retail holidays rather than season-end clearance. Planning larger purchases — a new reel, a fish finder, a pair of waders — around these predictable windows rather than buying reactively right before a trip can meaningfully reduce the total cost of building out a complete kit over a year or two.
Borrowing, Renting, and Trying Before You Buy
Before committing to an expensive category like a full kayak fishing setup or a premium fish finder, it’s worth exploring whether you can borrow from a fishing friend, rent from a local outfitter, or try a guided trip that provides the gear as part of the package. This lets you confirm real interest and identify your actual preferences — hand-powered versus pedal-powered kayaks, for instance, or a simpler versus more feature-dense electronics display — before spending money on a category you might later realize doesn’t suit your fishing style as well as you expected.
Sharing and Splitting Costs With Fishing Partners
For gear that isn’t needed on every single trip — a specialized ice auger, a portable shelter, or a second boat battery — splitting the cost with a regular fishing partner is a practical way to access higher-quality equipment than either angler might justify buying solo. This arrangement works best with a simple, agreed-upon understanding about storage, maintenance responsibility, and scheduling around shared trips, but for gear categories used only a handful of times per season, shared ownership routinely makes more financial sense than either duplicate purchases or going without entirely.
Investing in Skill Alongside Gear
It’s worth closing this section with a reminder that gear is only one half of the equation. A modest kit paired with solid casting accuracy, good knot-tying, and an understanding of basic fish behavior consistently outproduces an expensive kit used without those fundamentals. Local fishing clubs, guided trips, and even free instructional content from tackle manufacturers and experienced anglers online are some of the highest-value, lowest-cost additions you can make to any budget tier — often mattering more to your results than the next gear upgrade would.
Reassessing Your Kit Once a Year
Gear needs shift as your skills, interests, and typical fishing trips evolve, and a kit that felt perfectly suited to your first season may feel noticeably mismatched two or three seasons later. Setting aside time once a year — often at the start or end of a fishing season — to review what got used heavily, what sat untouched, and what’s been quietly wearing out helps direct future purchases toward what will actually improve your time on the water, rather than accumulating gear based on what looked appealing in a store or an online listing months or years earlier.
Final Cast: Pack Smart, Fish More
A great day of fishing rarely comes down to luck alone — it comes down to preparation that lets you focus entirely on reading water, working a lure, and reacting to a bite instead of digging through a disorganized bag. Use this checklist as a living document: adjust it to your home waters, your target species, and the trips you actually take most often. Revisit it every season, because gear wears out and needs get refined the more time you spend on the water.
Every category covered here — rods and reels, line and terminal tackle, lures and bait, electronics, footwear, apparel, safety, storage, maintenance, and the specialized additions for kayak, ice, saltwater, fly, surf, and backcountry trips — exists to solve one of the same handful of recurring problems: staying comfortable, staying prepared, and staying focused on the water instead of on missing equipment. Build outward from the essentials at your own pace, lean on the comparison tables and checklists throughout this guide when you’re ready to shop, and let your own on-water experience keep refining the list from here.
Ready to fill in the gaps in your kit? Start with the essentials and build outward from there.
Shop Fishing Gear Essentials →Frequently Asked Questions
What is the single most important item on a fishing gear checklist?
A reliable rod-and-reel combo matched to your target species and fresh, undamaged line. Without these two items functioning properly, nothing else on the checklist matters.
How often should I replace my fishing line?
Monofilament and fluorocarbon degrade from UV exposure and should generally be replaced every few months with regular use, or immediately if you notice fraying, discoloration, or memory coiling. Braided line lasts longer but should be checked regularly near the terminal end for abrasion.
Do I need a fish finder as a beginner?
Not necessarily. Fish finders help locate structure and baitfish more efficiently, but beginners often benefit more from mastering casting, knot-tying, and basic presentations first. Once you’re fishing from a boat or kayak regularly, a fish finder becomes a much higher-value investment.
What’s the difference between a fish finder and a depth finder?
A depth finder shows only water depth, while a fish finder uses sonar to display depth, structure, and fish arches. Our fish finder vs. depth finder comparison covers this distinction in more detail.
Should I buy chest waders or ankle boots for bank fishing?
If you’re staying on dry banks or boat decks, ankle-height rubber boots are usually sufficient. Chest waders are only necessary if you plan to step into moving water above ankle depth, particularly during colder months.
How many lures do I actually need to start?
A focused starter selection of soft plastics, one or two crankbaits, a spinnerbait, a topwater lure, and a few jig heads covers the vast majority of freshwater situations. You can expand from there based on the specific water and species you fish most.
What safety gear is legally required for boat fishing?
Requirements vary by jurisdiction, but a properly fitted personal flotation device (PFD) is almost universally required on any vessel. Check your local boating authority for specific requirements regarding lights, sound signals, and fire extinguishers.
Is polarized eyewear really necessary, or just a nice-to-have?
Polarized lenses meaningfully improve your ability to see structure, fish, and drop-offs beneath glare, which directly impacts catch rates in clear to moderately clear water. It’s considered functional gear by most experienced anglers, not just a comfort item.
What’s the best way to organize a tackle box for a full season?
Use a modular tackle bag with swappable trays organized by lure category (soft plastics, hardbaits, terminal tackle, etc.) so you can bring only what’s relevant to a given trip instead of hauling your entire collection every time.
How do I maintain my reel after a saltwater trip?
Rinse the reel with fresh water immediately after use, avoiding a direct high-pressure spray into the reel body, then apply light lubrication to moving parts. Skipping this step after saltwater use significantly shortens a reel’s lifespan due to corrosion.
What should I add to my checklist for kayak fishing specifically?
Prioritize a paddle-sport-rated PFD, a paddle leash, a compact clamp-mount fish finder suited to limited kayak power, an anchor or drift sock, and a waterproof deck bag for items you need within arm’s reach.
Can I build a complete fishing kit on a tight budget?
Yes. Start with a basic rod-and-reel combo, essential terminal tackle, and a license, then add comfort items like footwear and sun protection as you fish more often. Electronics and specialized gear can wait until you’ve confirmed the specific type of fishing you enjoy most.
How do I know if my line has gone bad and needs replacing?
Look for fraying, discoloration, stiffness, or noticeable coiling that doesn’t relax when the line is pulled straight. Fluorocarbon and monofilament degrade primarily from UV exposure, so line stored in direct sunlight for long periods should be inspected more frequently than line kept in a shaded tackle bag. When in doubt, replacing line is inexpensive compared to the cost of losing a good fish to a failure at the worst possible moment.
What’s a reasonable starting budget for a first complete fishing kit?
A functional starter kit covering a rod-and-reel combo, basic terminal tackle, a small lure selection, and a license typically falls in the range of fifty to one hundred fifty dollars. Comfort items like proper footwear, sun protection, and a real tackle storage system can be added over the following months as you confirm how often and where you’ll actually be fishing.