
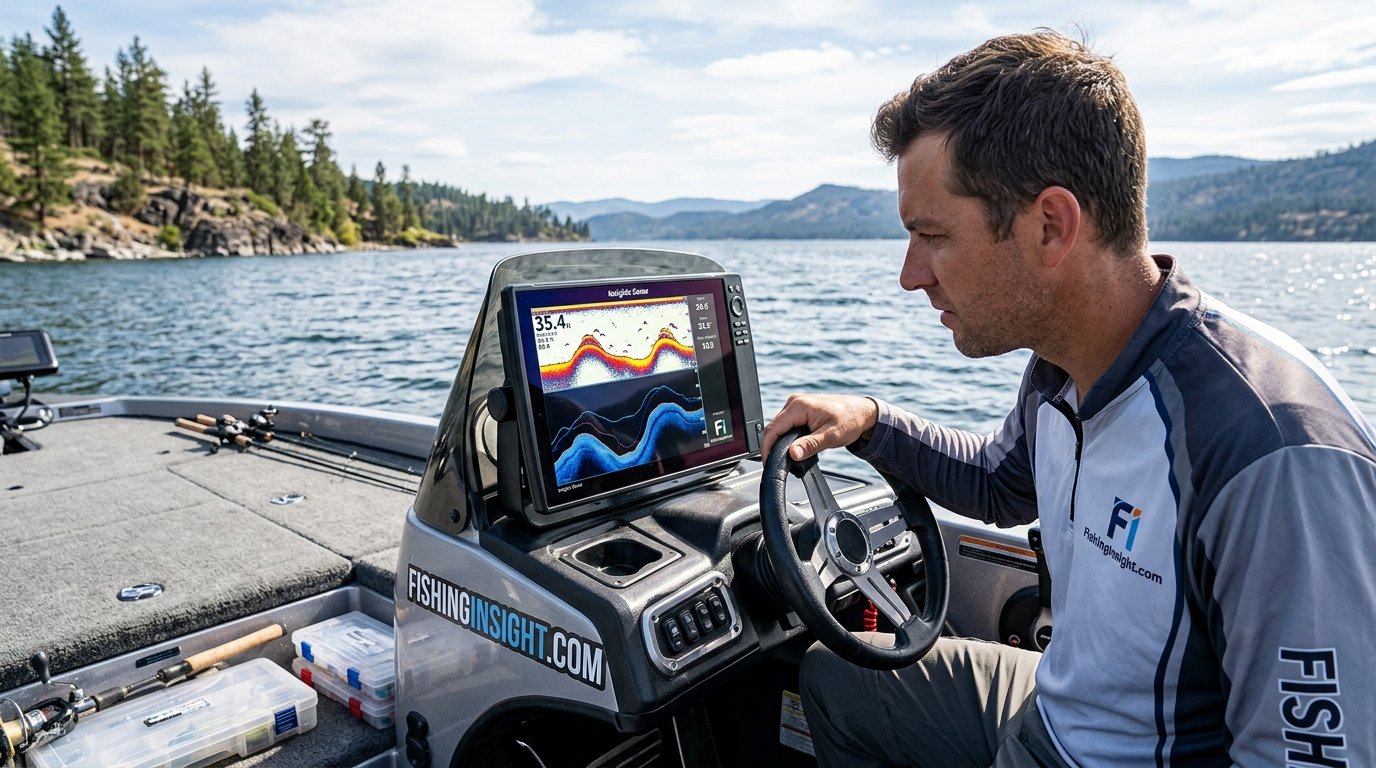
How to Read a Fish Finder: A Complete Guide for Beginners and Beyond
Turn the confusing blobs, arches, and lines on your screen into confident, fish-catching decisions.
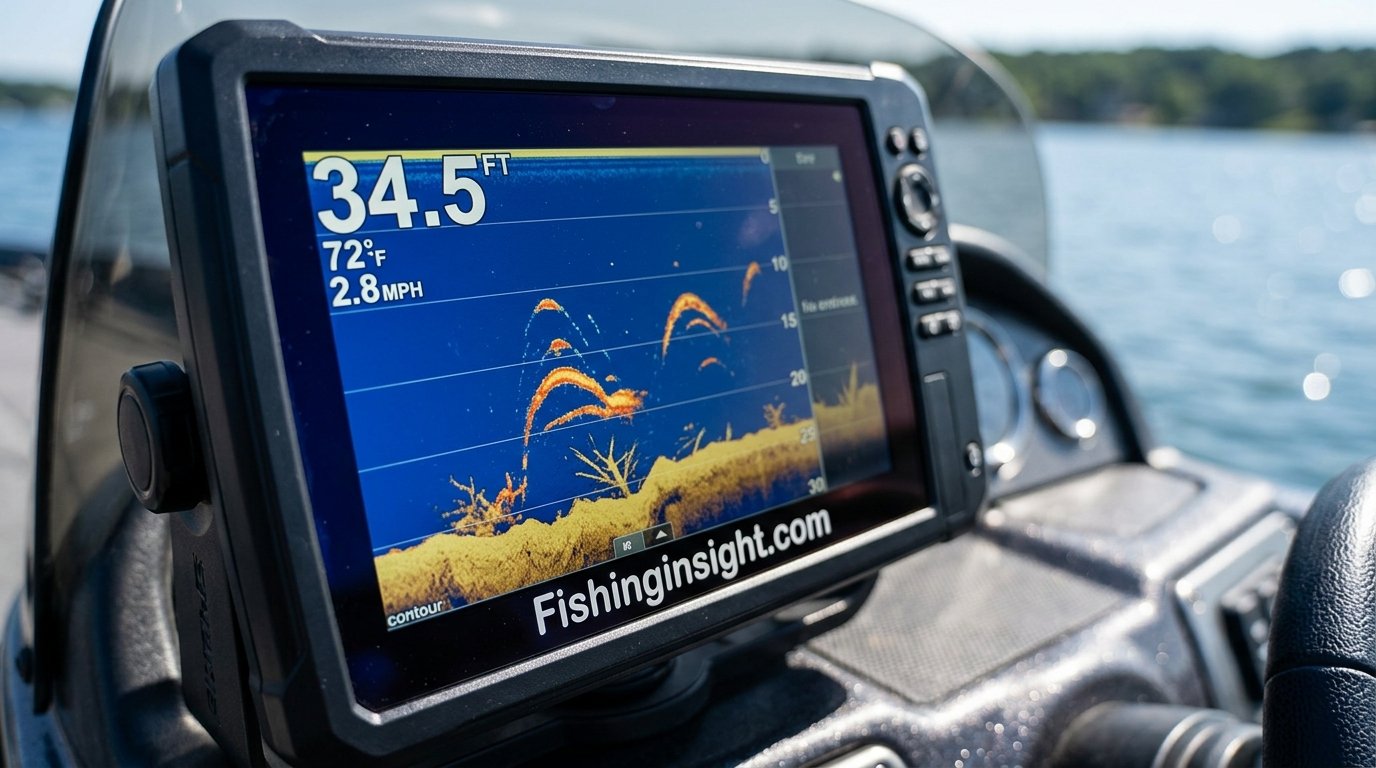
What a Fish Finder Actually Shows You
A fish finder doesn’t show you a photograph of what’s under your boat. It shows you a translated picture, built from sound waves bouncing off everything beneath the hull: the bottom, weed beds, submerged timber, bait balls, and yes, fish. Learning to read one is less about memorizing a manual and more about learning a new visual language. Once that language clicks, a screen full of squiggly lines turns into a live map of where fish are holding and why.
This guide walks through that language step by step, starting with the raw basics of how sonar works, then moving into exactly how to interpret depth, bottom hardness, fish arches, structure, and the newer imaging technologies most modern units include. If you’re just getting comfortable with your unit, our beginner walkthrough on how to use a fish finder pairs well with this article for the setup side of things.
Sonar Basics: Cone Angles, Frequency & Pixels
Before decoding specific shapes on screen, it helps to understand three things happening behind the scenes every time your transducer pings the water column.
Cone Angle
Your transducer sends sound in a cone shape, not a narrow laser beam. A wider cone (like 40-60 degrees on many 50 kHz signals) covers more area but sacrifices detail. A narrower cone (200 kHz and higher) shows sharper detail directly under the boat but covers less ground. This is why the same fish can look like a fat arch on one frequency and a thin sliver on another.
Frequency
Lower frequencies (50-83 kHz) penetrate deeper water and are favored offshore or in very deep lakes. Higher frequencies (200-455 kHz+) give crisper detail in shallower water, which is why most inland freshwater anglers lean on higher frequency settings for everyday fishing.
Pixels and Color
Every echo returns with a strength value, and your unit assigns that strength a color or shade. Strong, dense echoes (rock, a thick-bodied fish, a hard bottom) typically show as red or the darkest color in your palette. Weaker echoes (soft mud, small baitfish, thin weed) show as yellow, green, or blue depending on your color scheme.
Step 1: Power On and Set the Basics
Before you can read anything meaningful, your unit needs a sane starting configuration. Power on the display, confirm the transducer is transmitting (most units show a small ping indicator or scrolling screen once it detects water), and set your depth range to auto if your model supports it. Auto range keeps the bottom visible near the lower third of the screen as depth changes, which is the easiest starting point for beginners.
Also set your unit’s clock, boat speed source if using GPS, and confirm the sonar log/history feature is enabled so you can scroll back and review what just passed under the boat, which is enormously helpful while learning.
Step 2: Understand the Depth Reading
The number in the corner of your screen, usually large and bold, is your current water depth. This updates continuously as you move. The depth scale running along the side of the screen (in feet or meters) tells you how the visual image maps to actual depth in the water column.
If your unit is not on auto range, and you set a fixed range that’s much deeper than the actual water, your bottom line will appear compressed near the top, making everything look shallower and more cramped than it is. Widening or narrowing this manually to keep the bottom in the lower third of the screen gives the clearest picture.
Step 3: Identify the Bottom Signal
The bottom shows up as a thick, continuous line running across your screen. Its thickness and color tell you about bottom composition. A thin, sharp bottom line usually means soft bottom (mud or silt), because soft material absorbs more sound energy. A thick, dark, “doubled” bottom line typically indicates a hard bottom, like rock or gravel, because hard surfaces bounce sound back strongly, sometimes even producing a second, fainter echo below the first (a false second return).
Knowing bottom hardness matters because many species relate directly to bottom type. Smallmouth bass and walleye often sit tight to rock and gravel transitions, while catfish and carp frequently work soft, muddy flats.
Step 4: Spot Fish Arches vs. Fish Icons
This is the step most beginners fixate on, and understandably so. On traditional sonar (not fish ID mode), a fish appears as an arch shape, not a fish-shaped icon. The arch forms because as your boat moves over a stationary fish, the transducer’s cone first catches the edge of the fish (shorter distance, shows higher on screen), then the center (closest point, peak of the arch), then the trailing edge (shows lower again as the fish exits the cone).
A full, symmetrical arch tells you the fish passed directly under the transducer’s strongest signal. A partial or lopsided arch means it clipped the edge of the cone. Boat speed matters too: moving too fast can compress or distort arches into thin dashes.
Many modern units also offer a “Fish ID” mode that overlays a cartoon fish icon on detected arches. It’s beginner-friendly but less accurate, since the software is guessing based on arch shape and signal strength. Most experienced anglers turn Fish ID off and learn to read raw arches instead, since the raw sonar rarely lies.
Step 5: Read Structure and Vegetation
Structure and cover show up very differently from fish and bottom. Weeds typically appear as fuzzy, vertical green or yellow clusters rising from the bottom line, often with inconsistent height. Submerged timber or brush piles show as denser, more defined vertical or angled shapes with harder edges, since wood returns a stronger echo than vegetation.
Look for edges where structure meets open water, or where two bottom types transition, like rock meeting sand. These transition zones are consistently some of the most productive areas to fish because they concentrate both baitfish and predators.
Step 6: Adjust Sensitivity and Color Gain
Sensitivity (sometimes called “gain”) controls how much of the returning echo strength gets displayed. Too low, and you’ll miss suspended fish and light cover. Too high, and the screen fills with noise, clutter, and false echoes that bury real targets.
A good starting point is 70-85% sensitivity in most freshwater conditions, then fine-tune from there. Color gain works similarly but specifically shifts how strength maps to color, letting you emphasize the contrast between soft returns (bait, weed) and hard returns (fish, rock) without changing overall sensitivity.

The Garmin Striker 4 is a popular beginner pick with a clear, high-contrast display that makes arches and bottom detail easy to spot.
Check Price on AmazonDown Imaging vs. Side Imaging vs. Traditional Sonar
Traditional 2D sonar is the arch-based view covered above. Down Imaging and Side Imaging use higher frequencies to generate a photo-like picture rather than arches, which many anglers find easier to interpret once they know what they’re looking at.
| Feature | Traditional 2D Sonar | Down Imaging | Side Imaging |
|---|---|---|---|
| Fish appearance | Arches | Fish-shaped shadows/blobs | Fish-shaped shadows/blobs |
| Coverage area | Cone directly below | Narrow slice below boat | Wide swath left/right of boat |
| Best for | Depth and fish counting | Structure detail below boat | Scanning large areas quickly |
| Learning curve | Moderate | Low | Moderate |
| Works well while | Idling or trolling | Idling or slow cruising | Slow cruising in open water |
Rather than choosing one, most anglers flip between all three depending on the situation: side imaging to scout, down imaging to confirm what’s near a spot, and traditional 2D once anchored or trolling to actively track fish depth in real time.
Using GPS and Chartplotter Overlays
Many combo units layer a GPS map or chartplotter alongside sonar. This isn’t strictly “reading sonar,” but it dramatically improves how useful your sonar readings become, since you can drop a waypoint the instant you spot a good arch or productive structure, then return to that exact spot later. Contour lines on the map view also give you a preview of likely structure before your sonar even confirms it, which is especially useful on larger bodies of water where picking the best fish finder with solid mapping support pays off quickly.
Common Beginner Mistakes
Habits That Help
- Running auto range until comfortable
- Slowing down to confirm arches
- Marking waypoints on good returns
- Adjusting sensitivity gradually
- Cross-checking with down/side imaging
Mistakes to Avoid
- Running max sensitivity constantly
- Ignoring bottom hardness clues
- Running too fast to read arches
- Relying only on Fish ID icons
- Never reviewing sonar history/logs
Reading Fish Finders by Species and Water Type
Bass anglers typically watch for arches suspended just off submerged structure like rock piles or timber, since bass frequently relate tightly to cover. Walleye anglers pay close attention to bottom hardness and drop-offs, since walleye often stage on hard-bottom transitions at dusk. Crappie anglers focus on suspended arches in open water near brush, since crappie schools frequently hold well off the bottom rather than tight to it.
In saltwater, bait balls show up as dense, cloud-like clusters, often with larger predator arches lurking just beneath or beside them; a great example of why watching the whole water column, not just the bottom, matters. For a deeper unit-specific breakdown, our Lowrance Hook Reveal review and Humminbird Helix review both cover how each unit’s display handles these scenarios.
Recommended Fish Finders to Practice On
If you’re still shopping, it helps to start with a unit known for a clean, readable display rather than one crammed with features you won’t use for months.

Strong all-around choice with DownScan imaging and an easy-to-read display, good for anglers ready to move past pure 2D sonar.
Check Price on Amazon
A step up in display size and mapping features, well suited to anglers who want side imaging alongside traditional sonar in one unit.
Check Price on AmazonFor a full side-by-side breakdown across price points, see our complete best fish finder buying guide.
Frequently Asked Questions
Why does my fish finder show arches instead of fish shapes?
Traditional 2D sonar draws echoes over time as your boat moves, which naturally forms an arch shape as a stationary fish passes through the cone. Fish-shaped icons only appear when Fish ID mode is turned on, and that mode is interpreting the same arches for you.
What does a thick, dark line on the bottom mean?
It usually indicates a harder bottom surface, like rock or gravel, since hard surfaces reflect more sound energy back to the transducer than soft mud or silt does.
Why can’t I see any fish arches even though I know fish are there?
Your sensitivity may be set too low, your boat may be moving too fast to register a clean arch, or the fish may be holding tight to structure your cone angle isn’t fully covering.
Should I leave Fish ID mode on as a beginner?
It can help initially, but it’s worth transitioning off it fairly quickly, since raw arch reading tends to be more accurate and teaches you to actually interpret sonar rather than trust a guess made by the unit’s software.
What’s the difference between down imaging and traditional sonar?
Traditional sonar shows fish as arches using a wider cone, while down imaging uses a thinner, higher-frequency beam to produce a more photo-like picture of structure and fish shapes directly beneath the boat.
How do I know if my sensitivity is set correctly?
The bottom line should appear clean and well-defined without excessive speckled noise above it, and legitimate targets like fish or bait should still be visible without disappearing.
Why does the same fish look different at different speeds?
Boat speed changes how long a fish stays within the transducer’s cone, which changes how wide or narrow the resulting arch appears on screen.
What frequency should I use in shallow water?
Higher frequencies, generally 200 kHz or above, tend to produce sharper detail in shallow water, while lower frequencies are better reserved for deeper offshore use.
Can a fish finder tell me the size of a fish?
Not precisely. Arch width and thickness offer a rough hint, since larger fish tend to produce thicker, stronger arches, but water conditions and boat speed both affect that reading, so it’s an estimate rather than a measurement.
Why does my screen fill with speckled dots?
This is typically noise from sensitivity being set too high, interference from other electronics, or turbulence and aeration around the transducer at higher boat speeds.
Do I need side imaging to read a fish finder well?
No. Traditional 2D sonar alone is enough to become proficient at reading depth, bottom composition, structure, and fish arches; side imaging is a helpful addition, not a requirement.
How often should I adjust my settings while fishing?
Whenever water depth, clarity, or bottom composition changes noticeably, since a sensitivity or range setting dialed in for one stretch of water may not display just as clearly a few hundred yards later.
Conclusion
Reading a fish finder well isn’t about mastering every setting on day one. It comes from spending time on the water, watching how depth, bottom hardness, structure, and arches shift as you move, and slowly building the pattern recognition that turns a busy screen into a clear, useful picture. Start with the fundamentals in this guide, keep your settings simple while you learn, and layer in imaging tools once traditional sonar feels second nature.
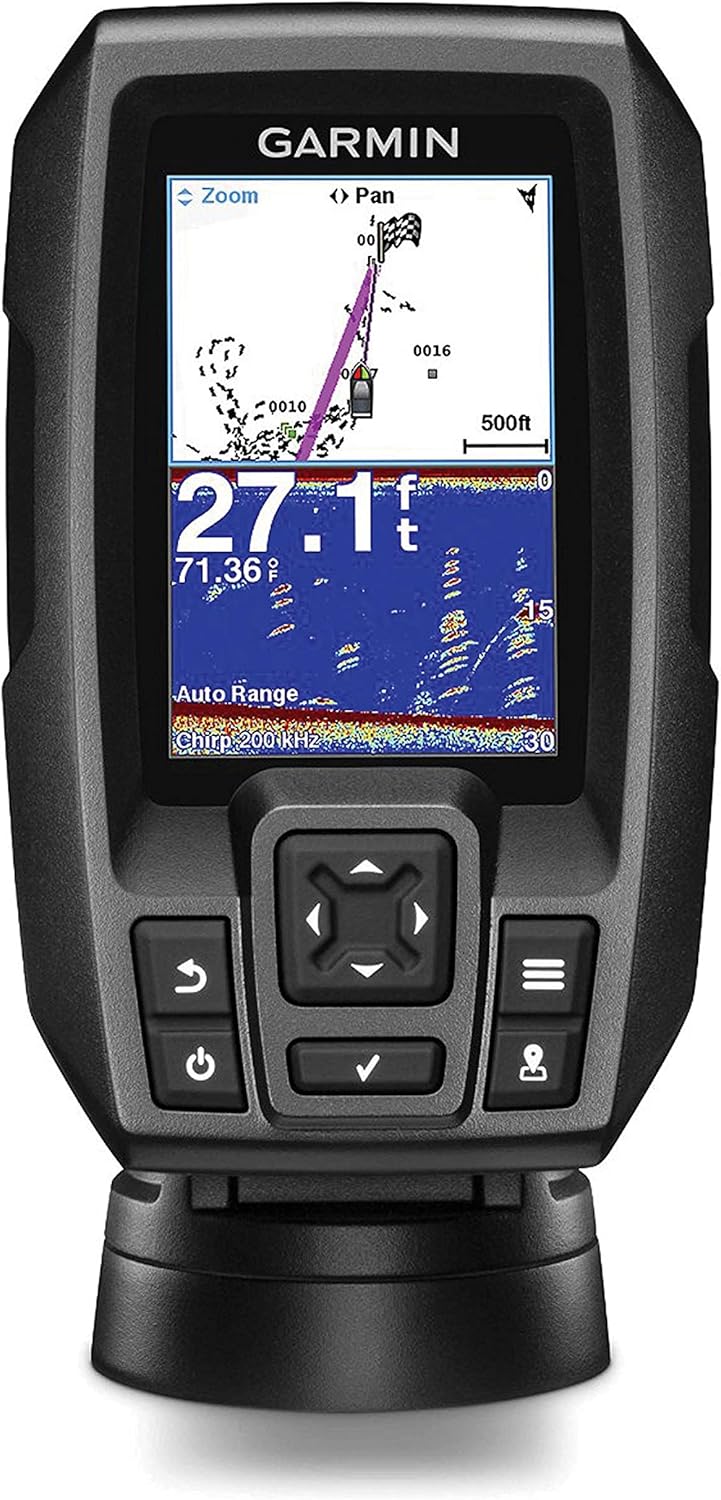
Pick up a beginner-friendly unit like the Garmin Striker 4 and start putting these reading skills to work on your next trip.
Check Price on AmazonAs an Amazon Associate, this site earns from qualifying purchases made through links on this page, at no additional cost to you.