How to Use a Fish Finder: The Complete Beginner-to-Advanced Guide
Learn how to mount, power, calibrate, and read a fish finder step by step, from your very first cast to interpreting arches, structure, and bottom contours like a seasoned angler.
What Is a Fish Finder and How Does It Actually Work?
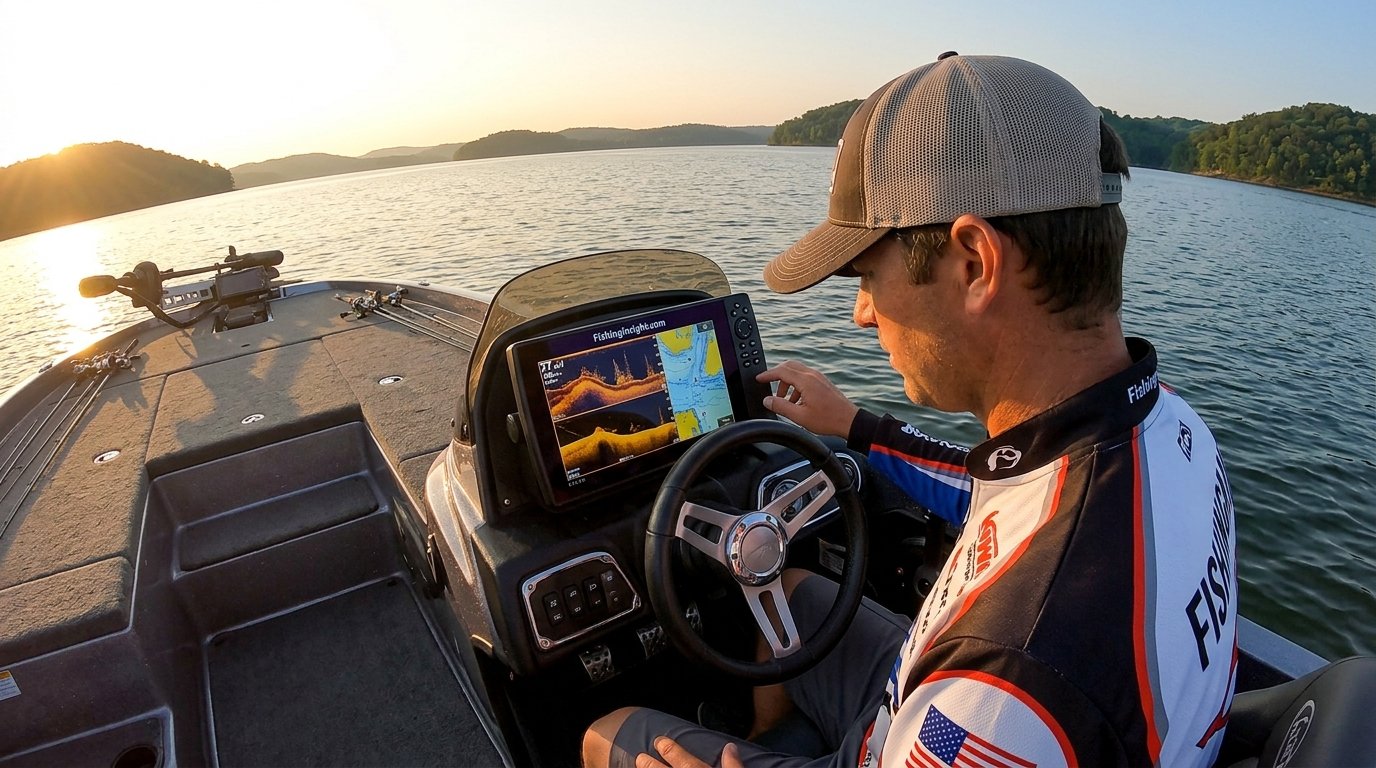
A fish finder is a piece of marine electronics that uses sonar, sound waves bounced off objects underwater, to show you what is happening beneath your boat in real time. Instead of guessing where fish are holding, you get a live picture of depth, structure, temperature, vegetation, and the fish themselves.
At its core, every fish finder works the same way. A transducer mounted on the hull or transom sends out a pulse of sound energy into the water. That pulse travels downward, bounces off anything solid it encounters, whether that is the lake bottom, a rock pile, a school of baitfish, or a single trophy bass, and returns to the transducer. The unit measures how long that round trip took and how strong the returning echo was, then translates that information into an image on your screen. Denser objects, like rock or a fish’s air bladder, produce stronger returns and show up as brighter, thicker marks. Softer bottoms, weed beds, and thin schools of bait return weaker signals.
Modern units go well beyond simple depth readouts. Down imaging and side imaging technology use higher frequencies to produce photograph-like detail, letting you distinguish between a stump, a dock piling, and a fish holding tight to structure. CHIRP sonar sends a sweeping range of frequencies rather than a single pitch, which dramatically improves target separation, so two fish sitting close together show up as two distinct marks instead of one blurry blob. GPS-enabled units layer in mapping, waypoints, and route tracking, turning the fish finder into a full navigation tool as well as a fish-locating one.
Understanding this underlying process matters because it changes how you read the screen. You are not looking at a live video feed of fish swimming around. You are looking at a scrolling history of sonar returns, refreshed continuously as your boat moves. Once that clicks, the rest of this guide, and everything you see on your display, starts to make a lot more sense.
It also helps to understand the shape of the sonar beam itself before you ever leave the dock. Sonar does not travel in a single thin laser-like line; it radiates outward from the transducer face in a cone, widening as it descends. A transducer rated for a 20-degree cone at 200 kHz will cover roughly 3.5 feet of bottom area for every 10 feet of depth, while a wider 60-degree cone might cover closer to 11 feet of bottom area at that same depth. This matters enormously for interpretation: the deeper the water, the wider the actual area being represented by any single mark on your screen, which is one reason a “fish” showing up at 40 feet in a wide cone might actually be several feet off to the side of the boat rather than directly beneath it, something side imaging and down imaging were specifically developed to correct for.
Frequency also interacts with cone width and penetration in ways worth understanding early. Lower frequencies carry further through water with less absorption, which is why offshore and deep-lake anglers favor 50 kHz for reaching several hundred feet, but that same low frequency produces a coarser, less detailed picture. Higher frequencies absorb more quickly, limiting maximum depth, but pack far more detail into the return, which is exactly why 800 kHz and above became the standard for down and side imaging, modes built specifically for shallower water where fine detail matters more than raw depth penetration. None of this needs to be memorized before you start fishing, but keeping the basic tradeoff in mind, depth versus detail, will make every setting adjustment covered later in this guide feel intuitive rather than arbitrary.
Before diving into the setup steps, it helps to browse a current list of top-rated fish finders so you know what kind of hardware you are working with, since screen resolution, transducer frequency, and GPS capability all affect how these instructions apply to your specific unit.

Step 1: Choose the Right Fish Finder for Your Boat and Budget
Before you can use a fish finder correctly, you need one that matches how and where you actually fish. A unit built for deep-water offshore trolling behaves differently, and needs a different transducer, than a compact model meant for a kayak on a shallow farm pond. Getting this step right saves you from fighting your equipment later.
Start by thinking about screen size and resolution. A 4 to 5 inch display is fine for a small aluminum boat or kayak where console space is tight, while a 7 inch or larger high-resolution screen makes a real difference on bigger boats, especially if you plan to split the screen between sonar, down imaging, and a chartplotter view at the same time. Next, consider frequency range. Traditional 2D sonar in the 50 to 200 kHz range is the workhorse for general depth and fish detection. CHIRP sonar sweeps a broader band and gives sharper target separation. Down and side imaging typically run at higher frequencies, often 455 kHz to 800 kHz or more, trading depth penetration for incredible detail in shallower water.
Budget matters too, but think of it as buying capability rather than a price tag. Entry-level units in the sub-$150 range give you accurate depth and basic fish arches, which is plenty for casual pond and river fishing. Mid-range units between $200 and $500 typically add CHIRP, down imaging, and GPS mapping. Serious anglers chasing offshore species or fishing tournaments often move into networked systems above $800, which combine side imaging, live sonar, and multi-function chartplotters. If you are unsure which class fits your needs, our best fish finder roundup breaks down real-world picks across every budget tier.
Step 2: Mount the Transducer Correctly
The transducer is arguably the single most important component in the entire system, because it is the only part actually in contact with the water. A brilliant display connected to a poorly mounted transducer will still give you garbage readings, so this step deserves real attention.
There are three common mounting styles: transom mount, thru-hull, and shoot-thru-hull. Transom mounting is the most common for smaller boats and is relatively simple to install yourself, bolted or clamped to the back of the boat below the waterline. Thru-hull mounts pass through a hole drilled in the hull and are typically reserved for larger boats where hull turbulence at the transom would interfere with the signal. Shoot-thru-hull transducers are glued to the inside of a solid fiberglass hull, sending sonar through the hull material itself, useful when you want zero exposed hardware.
Whichever style you choose, the placement rules stay the same. Mount the transducer parallel to the waterline so it points straight down, not angled forward or backward, because even a slight tilt skews depth readings and weakens fish arches. Keep it clear of through-hull fittings, strakes, and anything else that creates turbulence or bubbles, since aerated water scatters sonar and produces a noisy, unreliable screen. On outboard and sterndrive boats, mount the transducer to the side of the propeller, roughly level with or slightly below the lowest point of the hull, so prop wash never passes directly over the face of the transducer.
After mounting, run the boat at cruising speed and watch the screen for dropout or static. If the reading disappears or gets noisy above idle speed, the transducer needs to be lowered slightly or moved further from the turbulence source. This single adjustment fixes the majority of “my fish finder doesn’t work at speed” complaints.
Step 3: Install and Power the Display Unit
With the transducer sorted, the next job is mounting the head unit somewhere you can see it clearly from the helm without blocking your view of the water, and wiring it to a stable power source. Most fish finders run on 12-volt DC power and draw relatively little current, but a clean, dedicated power run still matters.
Choose a mounting location within easy reach of the wiring harness and at a comfortable viewing angle, angled slightly upward if you will be standing rather than seated. Many units include both a fixed bracket and a swivel or gimbal mount; the swivel mount is worth the extra few minutes of installation time because it lets you tilt the screen to kill glare depending on sun position.
For wiring, run the power leads directly to the battery or a fused accessory panel rather than tapping into another device’s circuit, and always install an in-line fuse sized according to the manufacturer’s manual, typically 3 to 5 amps for most consumer units. Keep the transducer cable and power cable separated from other electrical wiring where possible; running them alongside a bilge pump or trolling motor cable can introduce electrical interference that shows up as random noise on the screen. Once wired, route and secure the cables with zip ties so nothing dangles near moving parts or gets pinched when you tilt the outboard.
Power on the unit before you leave the dock. Most fish finders walk you through an initial setup wizard covering language, units of measurement, and transducer type. Take your time here; entering the wrong transducer model during setup is one of the most common reasons anglers get inaccurate depth or blank screens later.

Step 4: Understand the Fish Finder Display and Icons
Once your unit is mounted and powered, the real learning curve begins: reading the screen. Traditional 2D sonar scrolls from right to left, with the rightmost edge of the screen representing “now” and everything to the left representing a history of what has already passed beneath the boat. As your boat moves forward, new information continuously pushes older readings off the left side.
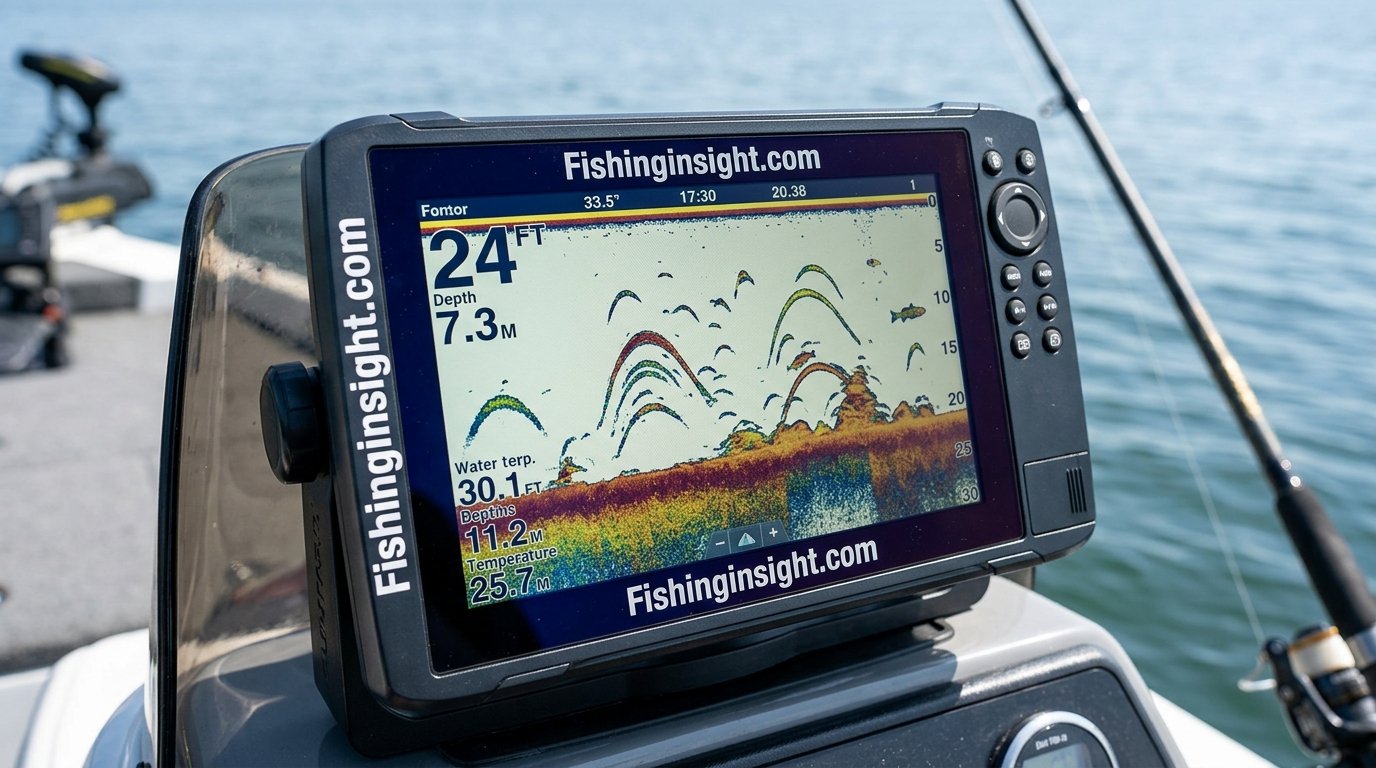
Along the top of the screen you will typically see current depth, water temperature, and boat speed if GPS is connected. The vertical axis represents depth, with numbers running down the side of the screen, and the horizontal scrolling line near the bottom of the display represents the lake, river, or ocean floor. A thicker, darker bottom line usually means a harder bottom, like rock or gravel, while a thinner, softer line often indicates mud or silt.
Individual fish typically appear as arch shapes rather than dots, a byproduct of the cone-shaped sonar beam. As a fish swims through the edge of the cone, enters the center, and exits the other side, the changing distance from the transducer creates that curved arch on the display. A tight, well-defined arch usually indicates a fish moving steadily through the cone at a consistent depth, while a flat mark or thick blob is more often a school of baitfish or the fish holding still directly under the boat. Color and thickness communicate signal strength: brighter or warmer colors, and thicker marks, mean a stronger return, which usually correlates with a larger or denser target, though it can also simply mean the object is closer to the transducer.
For a deeper breakdown of icons, colors, and screen settings across specific brands, our dedicated guide on how to read a fish finder walks through manufacturer-specific display quirks in more detail than we can cover here.
Step 5: Set Sensitivity, Frequency, and Sonar Cone Angle
Out of the box, most fish finders run in an automatic mode that adjusts sensitivity and range on the fly. Automatic mode is a fine starting point, but manual control unlocks noticeably clearer readings once you understand what each setting actually does.
Sensitivity controls how strongly the unit displays returning echoes. Turn it too low and you will miss faint targets like suspended baitfish or fish holding tight to soft bottom. Turn it too high and the screen fills with clutter, false echoes bouncing off air bubbles, boat wake, or thermoclines, that make it hard to distinguish real targets. A good starting point is to increase sensitivity until light clutter just begins appearing on the screen, then back it off slightly until the clutter clears while genuine targets remain visible.
Frequency selection matters just as much. Lower frequencies, around 50 kHz, penetrate deeper water with a wider cone but produce less fine detail, making them useful offshore or in very deep lakes. Higher frequencies, 200 kHz and above, sacrifice maximum depth for sharper detail and better target separation, ideal for shallower inland lakes and rivers. If your unit supports CHIRP, use it whenever possible, since sweeping a frequency range rather than transmitting a single pitch produces noticeably crisper arches and better separates fish holding close together.
Range and scroll speed round out the core manual settings. Set the range just deeper than the actual water depth rather than leaving it maxed out; a tighter range zooms in on the relevant water column and makes fish and structure easier to spot. Scroll speed controls how quickly the picture moves across the screen; a faster scroll shows more detail per fish pass but pushes older data off screen sooner, while a slower scroll preserves history longer at the cost of some resolution.
Step 6: Read Arches, Blips, and Bait Balls
This is where the fish finder starts translating directly into more fish in the boat. Learning to instantly tell the difference between a single quality fish, a school of baitfish, and structure clutter is the skill that separates casual users from anglers who genuinely fish smarter because of their electronics.
A clean, symmetrical arch spanning a good portion of the vertical screen usually represents a single fish passing through the sonar cone at a steady depth. The taller and more defined the arch, the longer that fish spent within the cone, generally meaning it was directly under the boat’s path rather than skirting the edge. Thickness of the arch line correlates loosely with fish size, thicker and darker marks often indicate larger fish, though this is not an exact science since a fish closer to the surface reflects more sonar energy than the same size fish deeper down.
Bait balls, dense schools of shad, herring, or minnows, look completely different: a cloud-like blob rather than a defined arch, often with texture or speckling inside it that represents hundreds of small individual returns overlapping. These clouds are gold for predator fishing, since gamefish frequently stack up just below or beside a bait ball. When you spot one, slow down, mark it as a waypoint, and work the area thoroughly rather than idling past.
Fish holding tight to structure, docks, brush piles, rock ledges, often show up as small hooks or check marks right at the edge of the structure return rather than clean arches, since they are moving less and staying close to cover. With practice, you will start recognizing species tendencies too; bottom-hugging catfish and walleye often appear as flat marks pinned to the floor, while suspended species like crappie and striped bass show up mid-water column, frequently in loose clusters. Units with strong side imaging clarity, like the one covered in our Humminbird HELIX review, make this kind of distinction noticeably easier since fish holding off to the side of the boat show up with far more definition than on a basic 2D-only display.

Step 7: Use GPS and Mapping Features to Mark Waypoints
If your fish finder includes built-in or add-on GPS, you have access to one of the single most productive features on the entire unit: waypoints. A waypoint is simply a saved GPS coordinate, and dropping one the instant you find a productive spot, a brush pile, a ledge, a bait ball, a hot bite, means you can return to that exact location on demand, even months later or in low visibility.
Most units let you drop a waypoint with a single button press, then rename and organize it afterward into folders, for example separating crappie brush piles from bass ledges from boat ramps. Take advantage of this organization early rather than letting hundreds of generically-named waypoints pile up, since a cluttered waypoint list becomes nearly as hard to navigate as having no GPS at all.
Beyond marking spots, GPS mapping lets you set a route and follow it precisely, extremely useful for trolling a consistent depth contour along a creek channel or drop-off. Some higher-end units support downloadable high-resolution lake maps from third-party mapping companies, which show underwater topography in far more detail than a factory-preloaded chart. If you fish the same body of water regularly, investing in a detailed contour map for that specific lake often pays for itself within a season through faster, more confident spot-to-spot navigation.
Track logging is another underused feature. Many units can record your exact path as a breadcrumb trail, letting you retrace a productive drift or trolling pass with precision instead of estimating it by eye. Combine this with waypoints and you effectively build a personal, ever-improving map of a lake’s productive zones over repeated trips.
Step 8: Interpret Bottom Structure and Depth Contours
Fish relate to structure and bottom composition far more than they relate to open, featureless water, so learning to read what the bottom line on your screen is telling you is arguably as valuable as learning to spot individual fish arches.
Hard bottom, rock, gravel, or packed sand, returns a strong, well-defined signal that appears as a thick, dark line, sometimes with a visible secondary return line beneath it caused by the sonar pulse bouncing multiple times. Soft bottom, mud or silt, produces a thinner, fainter, more diffuse line without that clean secondary echo. Vegetation shows up as fuzzy or textured marks rising up from the bottom line, sometimes tall enough to resemble suspended fish until you learn to recognize the characteristic “fuzzy carpet” texture of weed beds versus the clean, isolated arch of an actual fish.
Depth contours, the underwater equivalent of topographic lines on a land map, are where a huge percentage of productive fishing happens. Points, humps, saddles between two deeper areas, and creek channel bends all create current breaks and ambush points that concentrate baitfish and predators alike. When idling over new water, watch for any sudden change in the bottom line’s depth or angle; a sharp drop from 8 feet to 22 feet over a short horizontal distance is a classic ledge, exactly the kind of spot worth marking as a waypoint and returning to fish thoroughly.
Thermoclines, a distinct temperature layer that forms in deeper lakes during warmer months, sometimes show up as a faint horizontal band across the entire screen at a consistent depth. Many species stack up just above or below this layer, so recognizing it can immediately narrow your search depth on unfamiliar water.
It is also worth learning to distinguish bottom structure from wood and rock cover sitting on top of that structure, since the two often blend together at a glance. A submerged tree or brush pile typically produces a jagged, irregular profile rising sharply off an otherwise smooth bottom line, sometimes with visible “branches” as separate thin spikes, while a rock pile tends to show a bumpier but more rounded profile without the sharp individual spikes. Docks and pilings show up as narrow, very consistent vertical marks extending from the surface down, easy to distinguish once you know to look for that uniform, unchanging width. Building this kind of visual vocabulary takes repetition, but every hour spent comparing what the screen shows to what you already know is down there, a stump you can see at low water, a dock you fish from shore, accelerates the process considerably.
Step 9: Combine Fish Finder Data With Fishing Technique
A fish finder is a tool, not a magic wand, and the final step in truly learning to use one is translating what you see on screen into actual decisions about lure choice, presentation depth, and boat positioning.
When you mark fish suspended at a specific depth, that number should directly inform your presentation. If arches are consistently showing at 14 feet over a 20-foot bottom, a crankbait rated to dive to roughly that depth, a jig worked at that count-down, or a swimbait retrieved at a matching depth will put your bait in the strike zone far more consistently than blind casting. Watching how fish react to your lure passing through the cone in real time, moving toward it, ignoring it, scattering away from it, gives you immediate feedback most anglers never get without electronics.
Boat positioning matters just as much as bait selection. If you consistently mark active fish on the up-current side of a piece of structure, position your boat so casts land on that side first rather than working the whole structure evenly. If side imaging reveals fish holding 40 feet off to the side of your current path rather than directly beneath the boat, adjust your trolling or drift line to actually pass over them next time instead of assuming your original route was correct.
Finally, treat every outing as data collection. Note water temperature, the depth fish were holding, and what structure type produced bites, either mentally or in a simple log. Fish finders reveal patterns over repeated trips that are invisible on any single outing, and anglers who deliberately track those patterns improve far faster than those who rely on the screen alone without connecting it back to technique.
Adjusting Your Fish Finder for Different Species and Fishing Styles
The nine core steps above apply universally, but a few practical tweaks help tailor your fish finder to the species you chase most and the style of fishing you do most often. Small adjustments in frequency, scroll speed, and sensitivity can meaningfully improve results once your base setup is dialed in.
Bass fishing on structure
Largemouth and smallmouth bass relate heavily to cover, docks, laydowns, rock piles, and grass lines, so down imaging or side imaging earns significant screen time for bass anglers. Keep boat speed slow, generally under 3 mph, when actively scanning imaging modes near structure, and mark every distinct piece of cover as a separate waypoint rather than relying on memory, since subtle differences between similar-looking brush piles often explain why one produces consistently and another never does.
Crappie and suspended panfish
Crappie frequently suspend in open water near submerged brush or standing timber rather than sitting directly on the bottom, which makes traditional 2D or CHIRP sonar, set to a tighter range around the suspension depth, extremely effective. Many crappie anglers slow-troll multiple jigs at the exact depth marked fish are holding, adjusting pole depth in real time as the screen updates, a technique sometimes called “spider rigging” that depends entirely on accurate depth reading from the fish finder.
Catfish and bottom feeders
Catfish typically hold tight to the bottom or just above it, especially around channel bends, submerged timber, and current breaks in rivers. A slightly lower frequency with a wider cone helps cover more bottom area while drifting or anchoring, and paying close attention to bottom hardness, since catfish often favor the transition zone between hard and soft bottom, can reveal productive stretches invisible to anglers without electronics.
Trolling for suspended predators
Species like striped bass, walleye, and lake trout often suspend at very specific depth bands tied to water temperature or baitfish location. When trolling, keep 2D or CHIRP sonar as the primary view since it handles higher boat speeds far better than imaging modes, and use marked fish depth to set precise leadcore or downrigger depths rather than guessing based on general species knowledge alone.
Ice fishing applications
Portable, flasher-style fish finders remain popular for ice fishing because they display sonar returns as a continuously updating dial rather than a scrolling screen, which some anglers find faster to interpret for jigging directly beneath a single hole. The underlying sonar principles from this guide still apply; a stronger, wider return band on a flasher indicates a bigger or closer target, and watching how a marked fish’s position on the dial responds as you raise or lower a jig gives the same real-time feedback loop described in Step 9.
| Fishing Style | Primary Sonar Mode | Ideal Boat Speed | Key Setting Focus |
|---|---|---|---|
| Bass on structure | Down/Side Imaging | Under 3 mph | Tight range near cover depth |
| Crappie suspended | 2D / CHIRP | 0.5–1.5 mph (slow troll) | Narrow range around suspension depth |
| Catfish bottom | 2D wide cone | Drift or anchor | Bottom hardness & contour changes |
| Trolling predators | CHIRP | 2–5 mph | Marked depth for downrigger/leadcore |
| Ice fishing | Flasher sonar | Stationary | Real-time jig response near bottom |
Useful Fish Finder Accessories Worth Adding
A handful of inexpensive accessories meaningfully improve the day-to-day experience of running a fish finder, especially for anglers upgrading from a basic setup or adding electronics to a boat for the first time.
Transducer arm or shoot-through mount
A pivoting transducer arm lets you kick the transducer up out of the water when trailering or navigating extremely shallow water, protecting it from impact damage without needing to loosen and remove hardware every time.
Sun cover and screen protector
Beyond the maintenance benefits covered earlier, a snap-on sun cover also reduces glare-related eye strain during long days on bright water, and a thin adhesive screen protector guards against scratches from tackle boxes, rods, and general boat clutter.
Portable power packs for kayak and float tube setups
Anglers running a fish finder without a dedicated boat battery, kayak, float tube, or small jon boat, benefit from a compact sealed lead-acid or lithium battery pack sized specifically for marine electronics, which avoids draining a starting battery and provides predictable runtime for a full day on the water.
Networked second display or autopilot integration
On larger boats, networking a second display at a different helm station, or integrating the fish finder with a compatible trolling motor for spot-lock and route-following, extends the value of GPS waypoints covered in Step 7 well beyond simple navigation.

Fish Finder Types Compared: 2D, CHIRP, Down Imaging, and Side Imaging
Not every fish finder technology suits every fishing style. Here is a straightforward side-by-side comparison to help you decide which mode, or combination of modes, deserves the most screen time on your unit.
It is worth repeating that these modes are not mutually exclusive competitors so much as complementary tools built into the same unit. A single afternoon on the water might reasonably involve running side imaging at moderate speed to scan a stretch of shoreline for likely structure, switching to down imaging once a promising spot is found to confirm exactly what that structure looks like and whether fish are actually present, then dropping into a tight-range CHIRP view for the final approach and cast, watching individual arches respond as the bait falls through the water column. Thinking of your fish finder as a toolbox with five different tools rather than a single display with one correct setting is the mental shift that separates anglers who feel like they are fighting their electronics from anglers who feel like the electronics are working for them.
| Sonar Type | Best For | Detail Level | Typical Depth Range | Learning Curve |
|---|---|---|---|---|
| 2D Traditional | General depth & fish arches, all-purpose fishing | Moderate | Very deep capable | Low |
| CHIRP | Separating tightly grouped fish, deep structure fishing | High | Deep | Low–Moderate |
| Down Imaging | Identifying structure shape, cover, and fish position directly below | Very High | Shallow to moderate | Moderate |
| Side Imaging | Scanning wide areas quickly to locate structure and schools off to the side | Very High | Shallow to moderate | Moderate–High |
| Live/Real-Time Sonar | Watching fish react to your bait in real time | Extremely High | Shallow to moderate | High |
When 2D/CHIRP Shines
- Best raw depth accuracy of any mode
- Easiest for beginners to interpret quickly
- Excellent for deep, offshore, or open water
- Lower cost transducers and hardware
Where Imaging Modes Win Instead
- Photo-like clarity on structure and cover
- Side imaging scans far wider than the boat’s path
- Easier to tell fish apart from debris or wood
- Better for shallow, structure-heavy lakes
Most anglers who fish a mix of conditions end up relying on a split-screen view, CHIRP or 2D on one half for reliable depth and arches, imaging on the other half for structure detail, switching emphasis depending on whether they are searching for new spots or working a known one thoroughly.
Using Water Temperature and Seasonal Data to Find Fish Faster
Most fish finders display real-time surface water temperature alongside depth, and this single number is far more useful than many beginners realize. Fish are cold-blooded, so their metabolism, feeding activity, and preferred depth all shift directly with water temperature, which means the number in the corner of your screen is quietly telling you where to look before you even drop a line.
In early spring, watch for temperature differences between coves and creek arms versus the main lake body; shallow, protected areas warm several degrees faster under direct sun, and that small temperature edge often pulls baitfish and spawning gamefish into those areas well before the rest of the lake comes alive. Idling around with an eye on the temperature readout, rather than blindly running to last year’s spring spots, frequently reveals which specific pockets are actually holding the warmest, most active water on any given day.
During summer stratification, many lakes develop a thermocline, a narrow band where temperature drops sharply with depth, separating warmer surface water from cooler, often oxygen-poor water below. As mentioned earlier, this layer sometimes appears as a faint horizontal smear across the entire screen. Fish frequently concentrate just above this line, since water below it can hold too little dissolved oxygen to support them regardless of temperature. Locating that band and fishing just above it is one of the most reliable summer patterns available to anyone running electronics.
As water cools into fall, the process reverses: surface and deep water temperatures gradually equalize in a process called turnover, briefly disrupting predictable summer patterns before fish settle into deeper, more stable structure for winter. Tracking temperature trends across the season, even with a simple written log noting temperature, depth of fish, and structure type, builds a personal seasonal pattern for your home water that becomes more valuable every year you fish it.
Common Fish Finder Mistakes Beginners Make
Most frustration with fish finders traces back to a small handful of avoidable setup or interpretation mistakes. Working through this list will fix the majority of “my fish finder isn’t working right” situations without needing a new unit.
Mounting the transducer at the wrong angle
Even a five-degree tilt forward or backward distorts depth readings and weakens fish arches into flat, unreadable smears. Always check the transducer is level with the waterline after final installation, not just visually but with a level tool if possible.
Leaving sensitivity on a default that is too low
Factory default sensitivity is often conservative to avoid overwhelming new users with clutter, but it can also hide legitimate targets, especially suspended baitfish and fish tight to the bottom. Nudge sensitivity upward until faint clutter just appears, then back off slightly.
Running the boat too fast for the frequency in use
Higher frequencies and imaging modes need slower boat speeds to build a clear picture; blasting across a lake at 30 mph on down imaging produces a compressed, smeared mess rather than useful detail. Slow down when actively scanning structure.
Ignoring the manual transducer or hull-type setting
Selecting the wrong transducer model or hull material during initial setup silently degrades accuracy across the board. Double-check this setting matches your actual hardware, especially after a factory reset or firmware update.
Confusing clutter for fish, or fish for clutter
New users often either chase every random mark as a “fish” or, in the opposite mistake, dismiss real arches as noise after being burned once by false clutter. Spend a session simply watching the screen without fishing to build pattern recognition before trusting every read completely.
Not cross-referencing with a proven review before buying
Skipping research before purchase leads to buying a unit mismatched to actual fishing style or boat size. Reading a detailed Garmin Striker 4 review or a Lowrance HOOK Reveal review before purchase avoids most of these headaches entirely.
Leaving the unit on a single frequency all day
Sticking exclusively to one frequency or imaging mode regardless of what you are trying to accomplish wastes the flexibility built into modern units. Searching new water calls for wide-cone or side imaging to cover ground quickly, while working a confirmed spot thoroughly calls for a tighter CHIRP range for the clearest possible arches. Switching modes deliberately, rather than defaulting to whatever the screen happened to load with, meaningfully improves results over a full day on the water.
Forgetting to update the transducer offset after re-mounting
If you ever remove and reinstall the transducer, for winter storage or a boat repair, the depth offset setting, which accounts for the vertical distance between the transducer face and your boat’s waterline or keel, needs to be rechecked. Skipping this step after reinstallation is a common cause of depth readings that are consistently off by a fixed amount even though the transducer itself is working perfectly.
Maintaining Your Fish Finder for Long-Term Reliability
Marine electronics take a beating from sun, spray, and vibration, and a little routine maintenance goes a long way toward keeping readings accurate and hardware alive for years rather than a single season.
Rinse and inspect after every outing
Fresh water rinse the display, connectors, and transducer face after saltwater use especially, since salt crystallizes in connector pins and accelerates corrosion. Wipe the transducer face clean of any algae or mineral buildup, which degrades signal quality over time.
Protect the display from UV and impact
Use a factory or aftermarket cover when the boat is stored or trailered, since UV exposure is one of the leading causes of screen degradation and case cracking on units left permanently mounted and uncovered.
Check cable connections and dielectric grease
Periodically inspect the power and transducer connectors for corrosion, and apply a thin coat of dielectric grease to metal contacts before reconnecting, which meaningfully slows corrosion in a marine environment.
Keep firmware updated
Manufacturers regularly release firmware updates that improve sonar processing, fix GPS bugs, and add mapping compatibility. Check for updates once or twice a season using the manufacturer’s companion app or a direct SD card download from their support site.
Store the unit properly during the off-season
If you pull the boat out of the water for winter or an extended offseason, remove the display head entirely rather than leaving it mounted and exposed to freeze-thaw cycles and temperature swings inside a covered boat. Store it indoors in a dry location, and if the transducer cannot be removed easily, at minimum disconnect it from the display and cap or cover the connector to keep moisture and dust out. Batteries in portable units should be removed during long storage periods to prevent corrosion from a slow leak, which can permanently damage the connector even if the rest of the unit is undamaged.
Calibrate compass and GPS after long storage
Units with an internal compass, used for heading-based features like track-back navigation, can drift out of calibration after months of storage or a firmware update. Running the manufacturer’s compass calibration routine, usually a slow full circle turn on open water, at the start of each season takes only a couple of minutes and prevents subtly inaccurate heading data from throwing off route and waypoint navigation later.

Frequently Asked Questions
Do I need GPS on my fish finder, or is sonar-only enough?
Sonar alone is enough to find fish and read depth, but GPS adds waypoint marking, route tracking, and mapping, features that make returning to productive spots dramatically easier. If your budget allows, a combo unit is worth the extra cost for most anglers.
Why does my fish finder show fish that aren’t really there?
This is usually clutter from air bubbles, boat wake, or a thermocline layer rather than fish, especially at higher sensitivity settings. Lowering sensitivity slightly and confirming the transducer mount is turbulence-free typically resolves false readings.
What is the difference between down imaging and side imaging?
Down imaging shows a high-detail, photograph-like slice of what is directly beneath the boat, while side imaging fans out to both sides, scanning a much wider strip of bottom in a single pass, useful for quickly searching large areas of unfamiliar water.
Can I use a fish finder while trolling at speed?
Yes, though standard 2D and CHIRP sonar handle higher speeds far better than down or side imaging, which need slower speeds to build a clear picture. Many anglers switch to a wider frequency or 2D-only view specifically while trolling.
Why is my depth reading inaccurate compared to a known depth?
Inaccurate depth is almost always a transducer mounting or setup issue, either an angle that isn’t level, air trapped under the transducer face, or an incorrect transducer offset entered during setup. Recheck mounting angle and offset settings first.
How deep can a typical consumer fish finder read?
Entry-level 2D units commonly read to 200-300 feet, while higher-power CHIRP units can exceed 1,000 feet in ideal freshwater conditions. Imaging modes generally max out shallower, often under 150-200 feet, since they trade depth for extra detail.
Do fish get spooked by fish finder sonar?
Most research and angler experience suggests typical consumer sonar frequencies have minimal, if any, measurable effect on fish behavior at normal power levels, though some anglers reduce power or switch modes in extremely shallow, clear water out of caution.
Can I install a fish finder on a kayak or small inflatable boat?
Yes, portable and kayak-specific fish finders exist with suction-cup or clamp transducer mounts and battery-powered displays that need no permanent wiring, making them a popular option for kayak anglers.
What frequency should I use in shallow water under 15 feet?
Higher frequencies, generally 200 kHz or the higher end of a CHIRP sweep, along with down or side imaging where available, produce the clearest picture in shallow water, since fine detail matters more than maximum depth penetration.
How do I know if I need a new transducer versus a new display?
If the display powers on normally but sonar readings are blank, erratic, or lost entirely at speed, the issue is almost always the transducer or its cable rather than the display electronics, since displays rarely fail outright compared to transducers exposed to water and vibration.
Is a more expensive fish finder always better for beginners?
Not necessarily. A simpler, well-reviewed entry-level unit is often easier to learn on than an advanced networked system with dozens of menus, and many beginners get more consistent results starting with straightforward 2D and basic CHIRP before stepping up to imaging-heavy setups.
How long does it take to get comfortable reading a fish finder?
Most anglers can identify basic depth, bottom hardness, and obvious fish arches within their first couple of outings, but genuinely fast, confident interpretation of imaging modes, structure detail, and species-specific patterns usually develops over a full season of regular use on familiar water.
Should I run my fish finder on a split screen or a single full view?
A split screen combining CHIRP or 2D with an imaging mode gives the best of both worlds for most fishing situations, reliable depth and arches on one side, structure detail on the other, though a single full-screen view can be easier for absolute beginners still building basic pattern recognition.
Conclusion: Putting It All Together
Learning to use a fish finder is a skill that builds in layers. Start with a correctly mounted transducer and a properly wired display, then spend time simply watching the screen to build pattern recognition before layering in manual sensitivity, frequency, and range adjustments. From there, GPS waypoints and depth contour reading turn scattered good luck into a repeatable, personal map of productive water, and connecting what you see on screen to actual lure depth and boat positioning is what finally turns electronics into more fish in the livewell.
None of this requires expensive hardware to start. A budget-friendly unit used well consistently outperforms an advanced system left on default settings and never fully understood. Take these nine steps one outing at a time, and revisit our current best fish finder picks whenever you are ready to upgrade to a unit that matches the skills you have now built.
Give yourself permission to be a beginner for a few outings. Spend a session where the only goal is watching the screen and comparing what you see to what you already know about the water, rather than trying to catch fish and read electronics at the same time. That deliberate practice compounds quickly, and most anglers are surprised at how fast confident screen-reading becomes second nature once mounting, wiring, and basic settings are no longer things to think about consciously. From there, every trip adds another data point to your personal map of the water, and the fish finder stops being a gadget you own and starts being a genuine extension of how you fish.
Shop Top-Rated Fish Finders on Amazon